Showing posts with label tart. Show all posts

Friday, December 26, 2014

Rose's Alpha Bakers: Frozen Pecan Tart

It's week five of my bake-through adventure with Rose's Alpha Bakers. Up this week is the Frozen Pecan Tart - which I served for dessert after Christmas lunch - from Rose Levy Beranbaum's The Baking Bible. The tart was a huge hit and was met with a chorus of ohhs and ahhs and a round of "you made this? It's delicious! Seconds, please."

my lovely Frozen Pecan Tart

a close up...

...and now a slice for dessert on Christmas

I let the tart warm for about 30 minutes before serving because it seemed rock solid when I took it out of freezer and I was a little unsure how a frozen tart/pie would taste (was it really not frozen through? It felt pretty solid!). But - never doubt Rose! - the filling was smooth and silky, almost like caramel. Even after 30 minutes, the tart was quite chilled - which was different than what I'm used to with pecan pie (warmed with vanilla ice cream, please) - but it was very, very good.

The tart would have been delicious with ice cream or whipped cream, but was equally good on its own. It was sweet, but not syrupy sweet like a lot of pecan pies. And - again, unlike most pecan pies I've made - the recipe made exactly the right amount of filling! With most pecan pies I've made in the past, you end up with either too much or too little filling. This recipe was perfect.

I added some leaf cutouts on surface of the tart (using these small leaf cookie cutters I bought at Amazon.com) and - other than wishing I had baked them slightly before adding to the tart so they would be a bit more brown - I really liked the decorative addition.

Here are my step-by-step photos.

mise en place for the crust

The crust was a pâte sucrée, so it's made with more sugar than a regular pie crust and has an egg yolk added to strengthen it. Pâte sucrée is a great crust for tarts because it's very sturdy and easy to roll out. I love making pies and tarts!

the heavy cream is added to the egg yolk

butter and sugar are creamed together

the flour is added to the butter-sugar mixture

then in go the creamy-eggs and everything is pulsed
until the dough is in pea-sized clumps

hello, gorgeous dough!

At this point, the recipe directions got very complicated about how to roll out the dough and lift it into the pan. It involved a pizza wheel, a 12" flan ring, and inverting the dough over the back of an 8" cake pan.

Hmmm...I normally just roll the dough larger than the tart pan and the gently work the dough onto the bottom, corners and up the sides. As much as I know that Rose never steers me wrong, I'm going to just to this my way. The main thing to remember is to not stretch the dough as you place it in the pan, otherwise it will pull back and shrink when it bakes.

measuring the dough

ta da - fits perfectly!

the dough is worked into the pan's fluted edges,
leaving no overhang

the tart shell is filled with rice and blind baked

while the tart shell is baking I made these leaf cutouts to go on top

...and now my gorgeous crust is done!

mise en place for the pecan filling

the filling is strained, giving it a silky smooth texture when baked

the pecans are laid out randomly or in a pattern, if you prefer

then the filling is poured over, gently

the leaves are laid down, edges covered and we're ready for the final bake

gorgeous!


Bye for now...

Sunday, August 11, 2013

Gâteau Breton


time for a bite...

This Gâteau Breton is another recipe by Rose Levy Beranbaum from Rose's Heavenly Cakes cookbook. One of the things I love about this cookbook is the variety of types of recipes. There are really complex cakes that take a couple of days to complete which I love, because sometimes I am just in the mood to bake something complicated and intensive that requires me to go out and find special ingredients or a new pan. But I also love that there are really straightforward - yet delicious - recipes, for which I am likely to already have all of the ingredients...and this is one of those. Simple, easy, yummy.

This dessert is sort of a cross between a shortbread, a cake, and is baked in a tart pan. As it bakes, the outer edge forms a flaky sort of a crust. The middle is lighter than a shortbread, but heavier than a cake and not too sweet. I recommend serving it with coffee and some whipped cream would be lovely too.

mise en place for the cake

the toasted almonds and some of the sugar...

are ground together

the butter and sugar are combined

and creamed for several minutes until nearly white in color

the eggs are added and beaten until fluffy to incorporate more air into the batter

the rum, vanilla, and almond mixture is added, then the flour mixture
is added in four parts

the finished batter is very stiff...

smooth the batter into the tart pan and brush with an egg wash

score the top with the tines of a fork

and voila, done!

it makes such a pretty presentation

lovely flaky crust

ready to serve

dense, but still flaky...delicious!


Bye for now...

Sunday, August 5, 2012

Avid Baker's Challenge: Blueberry Galette with Lemon Ginger Ice Cream

This month's Avid Baker's Challenge recipe is the Glazed Apricot-Plum Galette on page 228 of The Weekend Baker by Abby Dodge. I was planning to make my galette for a dinner party but one guest is allergic to plums, so I decided to use blueberries instead of the apricots/plum combo. This is my Blueberry Galette.

I absolutely love blueberries and since they are now in season, I've been getting two pints per week added on to my Boston Organics (love!) delivery. Over the past five or so weeks, I've made Blueberry Crumble, Blueberry Muffins (from Baking with Julia), Warm Cinnamon-Spiced Blueberry Cake (from ABC's The Weekend Baker) and Blueberry Crisp with the blueberries left over from this recipe. Wow, I'm surprised my skin hasn't turned blue!

For this week's Blueberry Galette, I also wanted to make some homemade ice cream. I decided that lemon and ginger would be the perfect flavors to go with blueberries. My Lemon Ginger Ice Cream is detailed in a separate post.

my finished galette

The recipe for the galette crust is from The Weekend Baker. Once again, I struggled with a recipe from this book. Frustrating. The dough for the crust was pretty easy to make and work with (despite it being 90+ and humid), but during cooking it split open in several places and most of the blueberry juice leaked out onto the sheet pan. I know that blueberries release a lot of juice, but it seems that many other ABC bakers had a similar problem using different kinds of fruit, so I do think it was the dough. Although, I will add that even though the bottom of the galette cooked in its own juices, it still had a firm, cooked bottom crust, which I wasn't expecting.

The other thing that was very difficult was that after baking and cooling the galette "slightly" (not very specific!) you have to use two large spatulas to lift it onto the serving plate. I could have used about 3 extra hands for this part. Due to the juices having leaked out, the galette was almost suctioned onto the parchment paper. Trying to lift it off the parchment - while not completely breaking it in half - was a huge challenge. I ended up using a huge spatula and two cardboard cake rounds to transfer it. But, in the end, I got it onto the serving plate in one piece and everyone at dinner loved it, so I guess that's all that matters!

Here is the recipe for my blueberry filling:

2 pounds fresh blueberries (I used slightly more than 2 lbs but about 1 lb of this mixture was used for my Blueberry Crisp)
juice from 2 lemons (about 1/4 cup)
zest from 2 lemons (about 2 heaped tablespoons)
2/3 c sugar (to taste, 1/2 would have been fine since the crust and crisp topping were slightly sweet)
3 T cornstarch
1/2 t ground cinnamon
1/4 t salt

Pour the lemon juice over the blueberries and mix gently so you do not crush the berries. Combine the remaining ingredients and mix thoroughly. Add the sugar mixture to the blueberries and mix (gently) until the berries are coated. Pour into the middle of the galette dough or, for the crisp, spoon into ramekins.

mise en place for the crust

I prefer to mix my pie crusts by hand, instead of a food processor,
so I can feel how the dough is coming together

after adding the water and lemon juice, I turned it onto the counter-top to finish it.
I used my bench scraper to finish cutting all the ingredients together.

for a tender crust, stop when everything has just come together

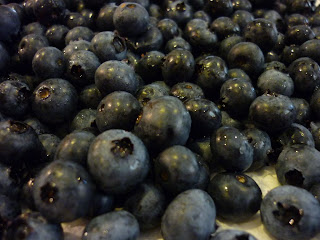
fresh blueberries - yum!

mise for the filling

so sweet and lemony, I could have just eaten the berries like this

the berries go into the center and the edges are folded up toward the middle

voila! The crust gets a brushing of milk and sprinkling of sugar before baking.

finally got it safely onto the serving dish

served with my homemade lemon ginger ice cream...
the combinations of flavors was fabulous!


Bye for now...