Warning: These croissants should only be made and enjoyed by serious chocolate-lovers.
 |
| a "scrap" of a croissant with frangipane filling |
Sometimes I like to get into long baking projects. I'll get into a mood when I want to experiment by trying something I've never made before or making something with many steps over a full day or two. So when I first got my
Baking with Julia cookbook in 1996, one of the first things I made were the croissants. However(!) at the time I didn't realize that there was such a huge difference between the active dry yeast I had in my fridge and the fresh yeast called for in the recipe. Undeterred, and thinking I could just substitute one for the other, I went ahead and used the active dry yeast that I had in the fridge. Big mistake. While the finished croissants were still edible, they were not the light, flaky, bits of buttery heaven I was expecting. So that experience put me off croissant-making for a while.
Then, a few years back I took a laminated doughs* baking class at
Cambridge School of Culinary Arts and we made croissants in class. We made our own puff pastry dough to bring home, but since the class was only a few hours long the dough we used to make croissants was already made for us; we just gave it a final turn and then cut and baked the pastries. So it wasn't until about 16 years after my first solo attempt that I dug in, tried again and finally made the perfect, homemade croissant. They were flaky, buttery, light and delicious! My most recent attempt all started a couple of months ago when I stumbled upon
Elra's Baking blog and her recipe for croissants made with chocolate
dough. They were absolutely beautiful and I thought to myself, "hmmm...I love chocolate and I love croissants, so I think I'd better try this recipe!"
First I needed a plan of attack. From my experience so many years ago, I knew that the process is very long from start to finish. There is a lot of rolling out of dough, resting of dough and chilling of dough. My strategy was to tackle these croissants over my winter vacation. Not only would I have plenty of time to go slow but the cold, dry weather would also work in my favor. Hot and humid conditions are a laminated dough's worst enemy! You want your butter to stay as cold as possible so that it will stay intact and not be incorporated into the dough. The butter is what helps to create the distinct layers* in the finished croissant.
Next, I needed a recipe. Elra's chocolate croissants are Julia Child's recipe with cocoa added to the butter so I knew that meant fresh yeast again. After trying four different grocery stores and coming up empty I needed a plan B, so I hit the internet. My plan B was to look up conversions from fresh compressed yeast to active dry yeast but after a while of searching dozens of websites I decided that there didn't seem to be one standard. It seemed that you needed to take into account how much sugar you were using and with such a complicated (or rather time-consuming) recipe overall, I just didn't want to throw more monkey wrenches into the equation. Okay...plan C, hit the internet again for a different recipe that didn't use fresh yeast (what did we do before the internet!). I ended up using a combination of the Julia Child recipe listed on Elra's site and this recipe for
Classic Croissants from Fine Cooking.
The dough was great to work with - it was well behaved and easy to roll out. I recommend working in a very cool room (a hot and humid day will ruin these babies) and remember to always let the dough rest in the fridge between the turns. This is important so the gluten can relax after all of the rolling but also so the butter can harden up again so it doesn't get absorbed into the dough. I also highly recommend either refrigerating your final croissants before baking, or freezing them. I ended up freezing the bulk of them (unbaked) and then would just pop a few into the oven for breakfast when desired. I found that the ones that had been frozen were much more flaky and had more distinct layers than the ones I baked the same day I made the dough (which hadn't been chilled/frozen first).
*What is a
laminated dough? A laminated dough is a dough that is made up by creating alternating layers of butter and dough, such as croissant or puff pastry dough. The thin layers of butter in between the thin layers of dough is what makes these doughs flaky because as the dough cooks, the water in the butter is turned into steam and the steam forces the dough layers apart creating the airy flakiness. Croissants are typically given 3-4 "turns" (see below for an explanation of a "turn"), while puff pastry is given 6-7 turns.
Now, on to the fun part, the step-by-step pictures.
Part I: the frangipane filling
I knew I wanted to fill some of the croissants with frangipane (almond creme), some with chocolate and leave some plain. So, first up I made the frangipane. I used the same
almond paste and frangipane recipes that I used last fall to make my
ABCer's Frangipane Ripple Chocolate Pound Cake.
 |
| mise en place for my almond paste |
 |
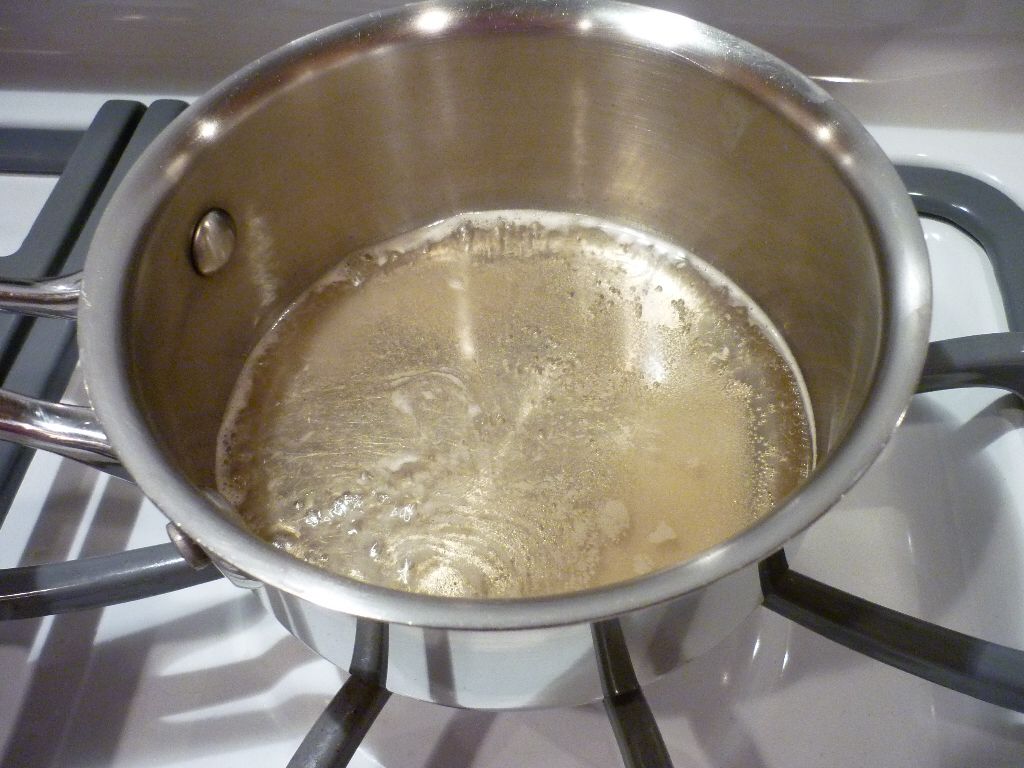
| water, corn syrup and sugar are boiled then the vanilla is added and the mixture is poured over... |
 |
| these toasted almonds as they are ground in a food processor |
 |
| mise en place for the frangipane: almond paste, more almonds, butter, sugar and an egg |
 |
| the nuts are ground and then everything is blended in a food processor |
 |
| the finished frangipane goes into the fridge to thicken up |
Part II: the butter square
 |
| following Elra's method, I combined the butter and cocoa powder... |
 |
| ...and then beat with the paddle attachment until smooth |
I liked this method of beating the butter with the mixer much better than the traditional method of beating it with a rolling pin. The mixer method worked much better to give the butter a smooth texture than the rolling pin method. It also made it much easier to form it into the square that will go inside your dough. One thing to be careful of though, is to not let the butter get too warm at this stage. You should work quickly and the butter should remain cool to the touch and relatively firm. A note however that if you use this method, you will need to chill the butter longer than you would have to for the rolling pin method. If it is too soft it will ooze out of the dough and make a huge mess...so be patient and let it chill.
 |
| my finished butter square |
Press the chocolate butter into a 7 inch square, wrap in plastic (butter will easily absorb other odors, so wrap securely), and refrigerate for several hours or overnight.
Part III: the dough
The dough is very easy to make because you don't have to proof the yeast - just combine all of the ingredients into your mixer's bowl and mix using the dough hook. Mix on low until everything is just combined and then turn to medium and mix for about 4 more minutes until the dough is very smooth and is slapping the sides of the bowl. Sprinkle some flour onto both sides of the dough, place on a pie plate, cover tightly with plastic wrap and refrigerate for eight hours or overnight.
What I did was to make the frangipane filling, butter square and dough on day one and then refrigerate them all overnight. The rolling, turning, rolling, shaping and baking were all saved for day two.
 |
| mise en place for the croissants (and butter square, on the right) |
 |
| finished dough - easy peasy! |
Part IV: incorporating the butter and making your "petit paquet"
On day two, take both the butter square and dough out of the fridge. Let the butter sit at room temperature for about 10 minutes (depending on the temp of your kitchen) while you roll your dough out to an 11 inch square. Don't forget to flour your surface. I mentioned above that you don't want your butter to be too soft, but you also don't want it to be too hard or it will not roll with the dough.
Place your butter square in the center of the dough as indicated below (on the diagonal) then fold each corner of the dough to the middle of the butter so the butter ends up completely enclosed inside the dough. Voila, your petit paquet.
 |
| placing the butter onto my dough |
It helps here to pinch the edges of your package closed so you don't end up with any butter leakage. It's okay to pull it a little to make sure you close up all the seems- just be careful not to tear your dough. Again, if your butter feels too soft, stop and put the whole thing on a sheet pan and into the fridge for 20 minutes to chill. Patience (and the refrigerator) is your best friend for the first two turns.
 |
| here is my little "petit paquet" or little package of butter wrapped up in dough |
Now we get rolling (sorry, bad pun). Make sure to flour your surface as needed throughout the rolling process, but don't go overboard as an excess of flour will toughen up your dough. And always brush off any excess flour when you finish rolling and make your turns.
Roll the package out to a rectangle of about 8x24". You should roll the long side to be vertical (as it's easier), but my counter was just not big enough so I rolled the long side horizontally as you'll see in my pictures.
During the rolling process you want to try to keep your dough rectangle with sides and corners as straight as possible. This will keep the butter layers going all the way to the edges. Also, once you incorporate the butter and begin rolling, do not trim the sides of the dough or the butter will start to ooze out of the sides. Just wait until you start shaping to trim the edges.
 |
| starting the first turn |
To make your first "turn," you are going to fold the dough into thirds, as you would fold a letter. The above picture shows the left third (loosely) folded over the middle third. The below picture shows the completed folding process which is called a turn. You should keep track of your turns either by poking your finger in the corner of the dough or just jot it down on a piece of paper.
Put the dough on a parchment-lined sheet pan then refrigerate the dough for about 1 hour to relax the dough and chill the butter.
 |
| turn #1 complete |
After the dough is chilled, roll it out to about 11x24". As you are rolling, make sure to lift your dough occasionally to make sure it's not sticking to your surface. As you can see below, I tore my dough with the edge of my rolling pin...no problem, just sprinkle a little flour on the area so the butter doesn't stick to your rolling pin and keep going.
As the dough gets thinner you can start to see that the butter inside is chocolate...yum!
 |
| at this point you'll notice the dough starts to get much easier to roll out. |
 |
| about 11 inches |
Rolled out to about 11x24" and time to make the second turn. Once again, fold the left third over the middle third and then the right third over the top.
 |
| as you go, be sure to brush off any excess flour |
 |
| turn #2 complete; then into the fridge to chill |
Once again roll the dough out to about 11x24". Looking more and more like chocolate dough!
 |
| ready to make the third turn |
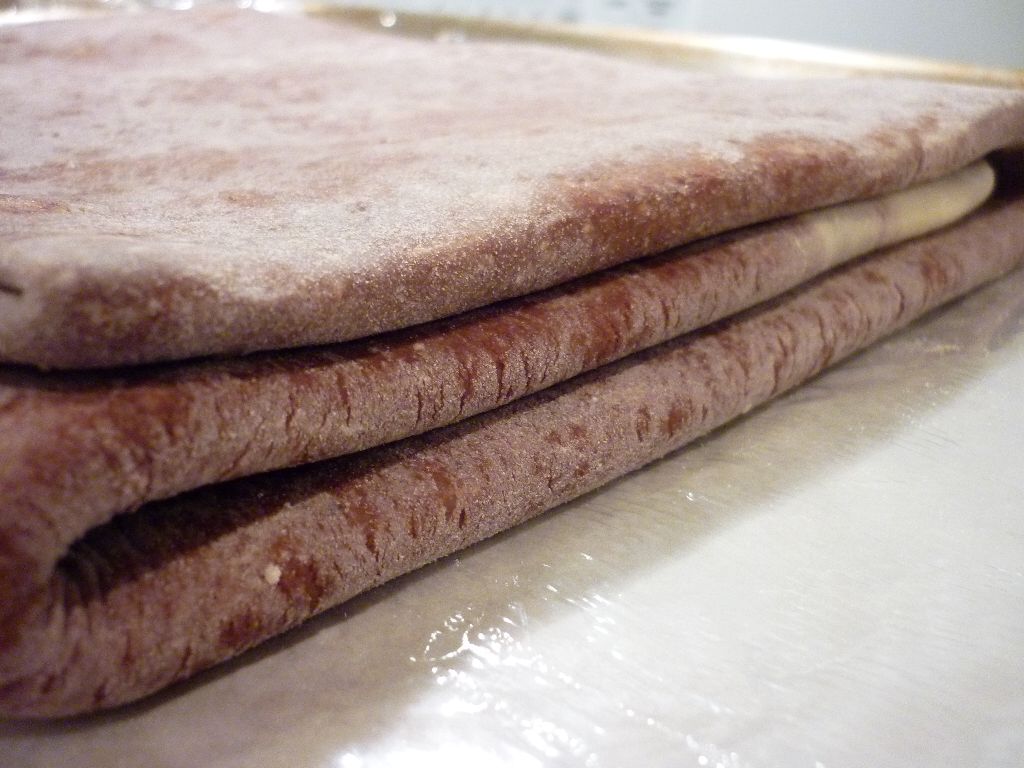
 |
| turn #3 complete; then into the fridge to chill |
Roll the dough out to about 11x24" again for the fourth turn (below). Different websites had different instructions on how many turns to give the croissant dough. I ended up going with four, but I think three would have been fine as well.
 |
| rolling out my final turn |
 |
| turn #4 complete; then into the fridge to chill |
 |
| so beautiful! |
Part V: cutting and shaping the croissants
You're going to need a pretty big surface for this part! After the final chill (which you can do overnight, if you wish), roll the dough out to about 13x47". What I was aiming for was a finished (trimmed) rectangle of 12x45".
 |
| the dough is smooth and chocolatey |
 |
| that is one long stretch of dough! |
 |
| using my ruler and a pizza cutter I cut out my pieces |
After cutting the entire length I had two long strips of 6x45 inches, I then cut 5 rows of 5 inches (to make the triangle pieces for plain and almond) and 5 rows of 4 inches (for chocolate). Finally, I cut the 5x6" pieces on the diagonal to make triangles.
 |
| all of my slicing done |
To shape the plain and almond croissants, take one triangle and cut a little notch into the long end.
 |
| cut a small notch |
Next, hold the notched end in one hand and using slight pressure with your other hand,
gently stretch it out to about 8 inches long. You don't want to pull so hard that you either tear the dough or smoosh your layers together.
 |
| hold with one hand and gently stretch |
Now it's time to fill the croissants. For the first few I went a little overboard - both frangipane and chocolate! They were absolutely divine.
 |
| a bit of the almond filling |
 |
| I didn't have chocolate batons so I just chopped up some high quality dark chocolate |
 |
| frangipane and chocolate? Have I gone too far? Never! |
To shape the almond croissants, just roll the triangle straight, starting with the long side. Very easy! Shaping the chocolate filled ones is the same - put your chocolate pieces on the short side of the rectangle and roll. The plain are only slightly harder to roll. You want to slightly spread open the notch (sort of tilt the tips of the triangle upward a little) and then start rolling. When you get to the end, pull the two tips together to create the crescent shape. You want to end with the "open" end of the tip facing upward (see below picture).
 |
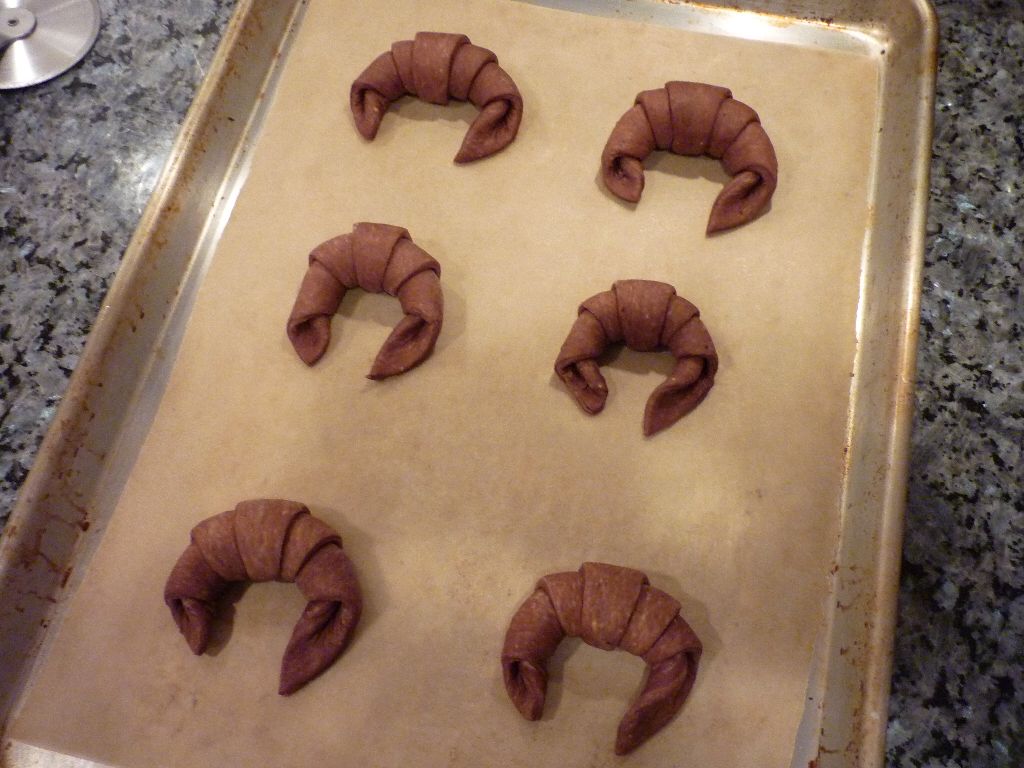
| plain croissants, ready for their final rise |
 |
| frangipane-filled croissants |
While I was waiting for the final rise of the shaped croissants, I decided to bake up the edge scraps that I created when I trimmed the dough. I filled some with the frangipane and left some plain. They were delicious!
 |
| a smear of almond creme on a scrap of dough, rolled up and baked |
|
| flaky and delicious |
 |
meanwhile the rest of the croissants are set aside to proof for about 2 hours
(depends on the temp of your kitchen) |
 |
| waiting waiting waiting |
The shaped croissants should proof (rise) for about 1-2 hours until they are large and puffy and jiggle slightly when you shake the sheet pan. At this point they can be frozen, which is what I did with the bulk of mine. I actually found that the ones that had been frozen came out much more flaky than the room temperature ones. I think this was because the butter had a chance to chill again so it created better layers when they baked up.
If you are going to bake them right away, beat an egg and brush gently over each croissant just before baking. Bake at about 375 for about 20 minutes. You might need a slightly higher temperature for your oven but I found that if I baked them any hotter the bottoms would burn. Also note that because the dough is chocolate it's a little harder to tell when they are done (vs a plain dough) so you will probably need a little trial and error here to find the exact baking time.
 |
| ready to bake |
 |
| done - gorgeous! |
 |
| a bit of chocolate melted out of the side...yum |
 |
inside a chocolate-filled croissant (I should have waited for them to cool a bit more as
I crushed the layers a little by cutting into it when it was too hot...
but I couldn't wait!) |
 |
| inside a frangipane-filled croissant |
Bye for now...


Wow! These are beautiful, Alice!!! They look really flaky and the frangipane sounds like an amazing addition to the choc croissants. I have yet to try making laminated dough from scratch. Maybe next winter. Right now I'm into making bread and eliminating yeast phobia :o)
ReplyDeleteThanks Hanaa! These were lots of fun, I definitely recommend putting laminated dough on your future baking to-do list :)
DeleteSorry I missed the cupcakes this month - I need to go check out everyone's pictures!
Alice - these look divine! I'm really impressed :) Keelin xx
ReplyDelete