Friday, January 3, 2014

Homemade puff pastry becomes...parmesan twists and palmiers

Using the scraps from my homemade puff pastry recipe I made some parmesan cheese twists and palmiers. I should really write it this way, "palmiers," because I just free-handed the shape as opposed to making them the traditional elephant ear shape. I basically just rolled them into circles and they ended up looking like shrimp because the "tail" separated a little during baking.

For the cheese twists, I simply grated some lovely Parmigiano-Reggiano cheese, brushed with egg and then pressed the cheese onto the dough, twisted, and put on the pan.

They were both delicious, buttery little snacks. Here are some photos:

a close up of my parmesan cheese twists

my little palmiers look like shrimp...but taste like sugar!

a little egg wash, some parmigiano-reggiano cheese and these are ready to bake

done! smells so good

check out all of the layers inside

just missing a glass of red wine

so yummy

baking up the curly palmiers

caramelized sugar...what could be better!

choices choices choices...which one to try first?


Bye for now...

Homemade puff pastry becomes...an apple tart

A beautiful, simple, and very easy apple tart. This is one of my all-time favorite desserts - especially for a family dinner, holiday, or dinner party - because it is so easy, but looks so fancy and beautiful! This time, I made my own homemade puff pastry, but you can also use store-bought (I think the Dufour brand is best).

gorgeous and delicious

look at those layers...beautiful!

The recipe is adapted from Martha Stewart's and you can use store-bought puff pastry or homemade. I've made homemade puff pastry a few times recently, once for Thanksgiving and once to make pithiviers. You can see the step-by-step directions for my puff pastry dough here if you want to make your own...try it, it's fun!

Ingredients

1 sheet homemade puff pastry (approx. 1 pound), or use frozen store-bought, thawed
all-purpose flour, for rolling out the dough
1 egg, lightly beaten, for egg wash
1/2 c. homemade or good-quality, unsweetened, applesauce
2-3 apples, peeled and cut into thin slices (use Granny Smith or other firm, tart apples)
juice from 1/2 lemon (or as much is needed to prevent the apples from browning
2 t. unsalted butter, melted
2 t. sanding or turbinado sugar
2 t. apricot preserves
1 tablespoon water

Method
Roll out your puff pastry sheet to approximately 14x16 inches. Trim 1 inch off from each side and carefully set aside. Put the large sheet of puff pastry on a parchment paper lined sheet pan.

Using the egg wash, carefully brush the outer 1" edge of the large pastry and place the 1 inch strips on the edge. Press gently with your fingers to seal and create an outer crust. You'll need to trim the strip you cut from the short ends so it fits back onto the larger piece of dough. Be careful with the egg wash so you don't let any drip over the cut edge of the dough. If the egg drips over the side, it will seal together all of your lovely puff pastry layers when you bake the tart.

Using the tines of a fork, prick the middle part of the pastry all over so it won't rise during baking. Put the puff pastry into the fridge to chill while you prepare the apples.

my lovely sheet of homemade puff pastry

The ingredients for the apple filling...so simple!

mise en place for the filling

Preheat the oven to 400 degrees while you prepare the apples.

Peel and core your apples. Cut the apples into thin slices and toss with a bit of lemon juice to they do not discolor.

slice, toss with lemon juice...and done!

Remove your puff pastry from the refrigerator and spread the applesauce over the inner (pricked) area. It should be chilled and very firm at this point, so you can do this quickly and not worry about being super gentle.

spreading the applesauce over the chilled dough

Layer the apple slices over the applesauce in whatever pattern you like. For expediency's sake, I just layer them like this, slightly overlapping.

Brush the apples in the middle with the melted butter.

Brush the outer 1" crust strip with the egg wash. Again, be careful not to let the egg wash drip over the side edges or it won't puff properly.

Sprinkle the sanding sugar over the entire tart - the apples and the crust.

brushing the apples with melted butter

brush the outer crust with the egg wash,
then sprinkle the sanding sugar over the entire tart

Bake the tart at 400 degrees for 20 minutes, until the edge crust starts to puff up. Reduce the temperature to 375, rotate the pan from front to back, and bake for an additional 25 or so minutes until the crust is golden brown.

During the last 10 minutes of baking, prepare the apricot glaze. Heat the apricot preserves and tablespoon of water in a small saucepan over low heat, stirring with a spoon or heat-proof spatula until they are completely combined and the mixture is hot. Remove from heat and set aside until the tart is done.

the baked tart

When the tart is done, gently remove to a cooling rack. You should be able to use the parchment paper to (gently!) lift the tart out of the sheet pan and onto the rack and then slide the parchment paper out from under.

Generously brush the apples with the apricot mixture.

Serve at room temperature with a small scoop of vanilla ice cream, whipped cream, or just enjoy plain.

so elegant...perfect for a party!


Bye for now...

Homemade puff pastry becomes...apple turnovers

I used half of my homemade puff pastry recipe to make these flaky, delicious apple turnovers. They were so pretty and professional-looking...but very easy. I definitely recommend trying these! You could also add raisins, nuts or use other fruit. The baked turnovers lasted about 3 days; next time I make them I'll freeze them when assembled (but unbaked) and then baked as needed, so we can enjoy them fresh out of the oven. They would be amazing with a small scoop of vanilla ice cream!

I used this bon appétit recipe (my slight adaptations are below) for Chaussons aux Pommes (French apple turnovers). Delicious!

so beautiful!
Ingredients
2 Granny Smith apples
2 other tart, firm apples, such as pink lady (or just use 4 Granny Smith apples)
1/4 c. water
3 t. sugar
3/4 t. fresh lemon juice
zest from one small lemon
1/8 t. freshly grated nutmeg
1/4 t. cinnamon
pinch of salt

1/2 recipe homemade puff pastry, approx. 15 ounces (or, use store-bought frozen puff pastry, thawed)
1 egg, lightly beaten
a few teaspoons of granulated sugar

the filling is so simple - apples, a bit of water, lemon, zest, sugar, salt, and spices

can I peel the apple in one go?

Method
Peel the apples and cut into small, uniformly-size pieces.

Add the apple pieces, water, sugar, lemon juice, lemon zest, salt, and spices to a medium saucepan. Stir to coat the apples. Bring the water to a boil and then lower the heat to medium-low, cover, and simmer for about 8-9 minutes. Give the apples a periodic stir so they cook evenly. You want the apple filling mixture to soften, but still have chunks of apples...we're not making applesauce!

Let the apple mixture cool completely (or it will melt the butter in your puff pastry and ruin the layers before you bake).

cooking down the apples

the finished apple filling
Here is my full recipe of homemade puff pastry; I used half for the apple turnovers and the other half for my Thanksgiving apple tart.

my full recipe of puff pastry; half is needed for this recipe

To make the tarts, roll out your puff pastry to a just larger than 15" square (you shouldn't need much, if any, flour when rolling). You want it slightly larger so you can trim off the edges and have a nice, sharp edge, which will allow the pastry layers to "puff" when it bakes. You can see how much I trimmed off in the above picture.

Using a ruler and sharp knife or pizza/pastry cutter, cut your 15" square into nine 5" squares; see below picture.

my nine 5" squares

Carefully stack the 9 squares between plastic wrap and chill for 30 minutes.

let the dough rest before filling and baking

After the dough has rested, you're ready to fill.

Lightly beat the egg with a fork and set aside. Put a heaping tablespoon of filling in the bottom center of the dough then brush the edge of the bottom half with your egg wash and gently fold the top half over. Using your fingers, gently press the two edges of the dough together. Don't press too hard or you will force the egg out and over the cut edge. You want to avoid getting egg on the cut edges of the dough or it will seal together all of your beautiful layers when you bake the turnovers.

At this point, the turnovers could be frozen - this is what I will do next time so they can be baked individually for breakfast or a snack.

adding the filling and sealing it inside

After all of the turnovers are filled, give each of them an egg wash and sprinkle with sugar. I used regular granulated sugar, but you could also use sanding sugar or turbinado sugar.

a quick brush of egg and sprinkle of sugar


Pop the filled, egg-washed turnovers into the fridge for another 20 minutes or so until they firm up a bit. This will chill the butter in the puff pastry and will help create better layers when you bake.

During this final chill, preheat the oven to 400 degrees.

The final step before baking is to cut some slits so the steam can escape during baking (otherwise they might pop open during baking).

ready to bake!

Bake on two parchment paper lined sheet pans at 400 degrees for 15 minutes. Lower the temperature to 350 degrees and bake for an additional 10 minutes or so, until golden brown. When you lower the temperature, also rotate the pans from front-to-back (if using two oven racks, also swap the pans from top to bottom).

gorgeous!

so pretty...and look at those puff pastry layers

Remove from the oven and, using a spatula, gently move to a cooling rack. Let cool for about 15 minutes; serve warm. They would be delicious with vanilla ice cream!

smells so good!

can't wait to dig in

flaky and delicious!

so good...I'll have to make these again soon...


Bye for now...

How to make homemade puff pastry from scratch: a step-by-step

For Thanksgiving this year, I made one of my favorite desserts, an apple tart. As a twist though, I decided to make my own puff pastry. I've made my own croissants before (see this post for a step-by-step), and puff pastry is only 2 additional turns, so I knew I could do it!

I've realized that I really like making laminated doughs (layers of alternating butter and dough). Once you get the hang of it, they are not too difficult. You just need to be patient, precise, and work in a cool kitchen. If you have hot and humid summers, like me, don't even bother to make them when it's hot...this is definitely a winter project.

I used the puff pastry to make:
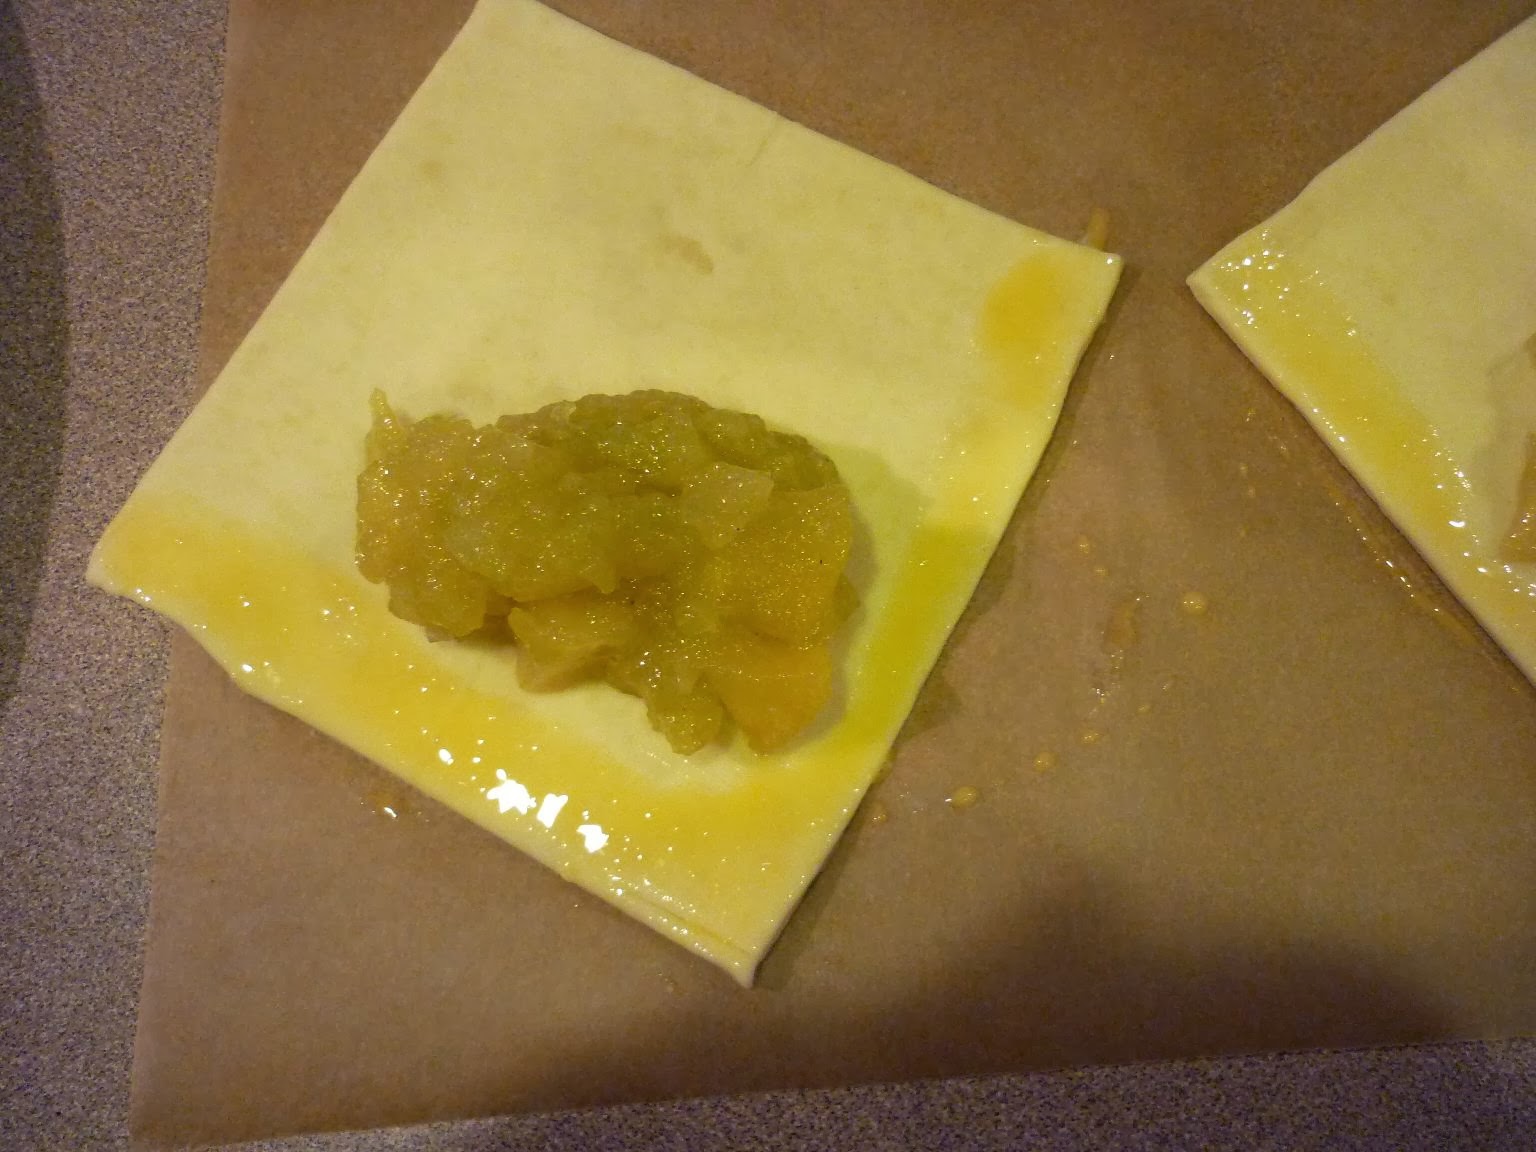
- apple turnovers
- an apple tart
- parmesan cheese twists
- pithiviers (an amazing French dessert of puff pastry filled with almond cream...yum!)

Look at how beautiful this dough is:

my finished dough

For the puff pastry, I used Julia Child's recipe from Baking with Julia, one of my favorite cookbooks, but I changed up the method a bit by adding some butter to the flour mixture. This was the method I learned in one of my baking classes at the Cambridge School of Culinary Arts - add some butter to the flour mixture and mix the dough by hand on the countertop rather than in the mixer (as instructed in Julia Child's book).

Ingredients for puff pastry, courtesy of Julia Child:
2 1/2 c. unbleached all-purpose flour
1 1/4 c. cake flour
1 1/2 t. salt (note JC's recipe calls for 1 T. salt but I felt this was too much)
1 1/4 c. ice water
1 lb. (4 sticks) cold unsalted butter, divide and set aside 4 t. for the flour mixture, the rest goes into making the butter square.

Method:
Step 1, make the dough Sift together the flour and salt onto the countertop. Make a "well" in the center and add 4 t. of butter, cut into small pieces.

adding the butter

Using a bench scrapper - or your fingertips - cut the butter into the flour until it resembles cornmeal. If you use your fingers, work quickly so the heat of your fingers doesn't melt the butter. A good method for using your fingers is to gather flour in them as you bring them to the butter so you are incorporating fingers full of flour (into the butter) as you rub and smoosh the butter.

incorporating the butter with a bench scraper or your fingers

Add the water a few tablespoons at a time until the dough comes together. You should need all of the water, but stop as soon as it comes together.

adding the water, fluffing and combining as you go

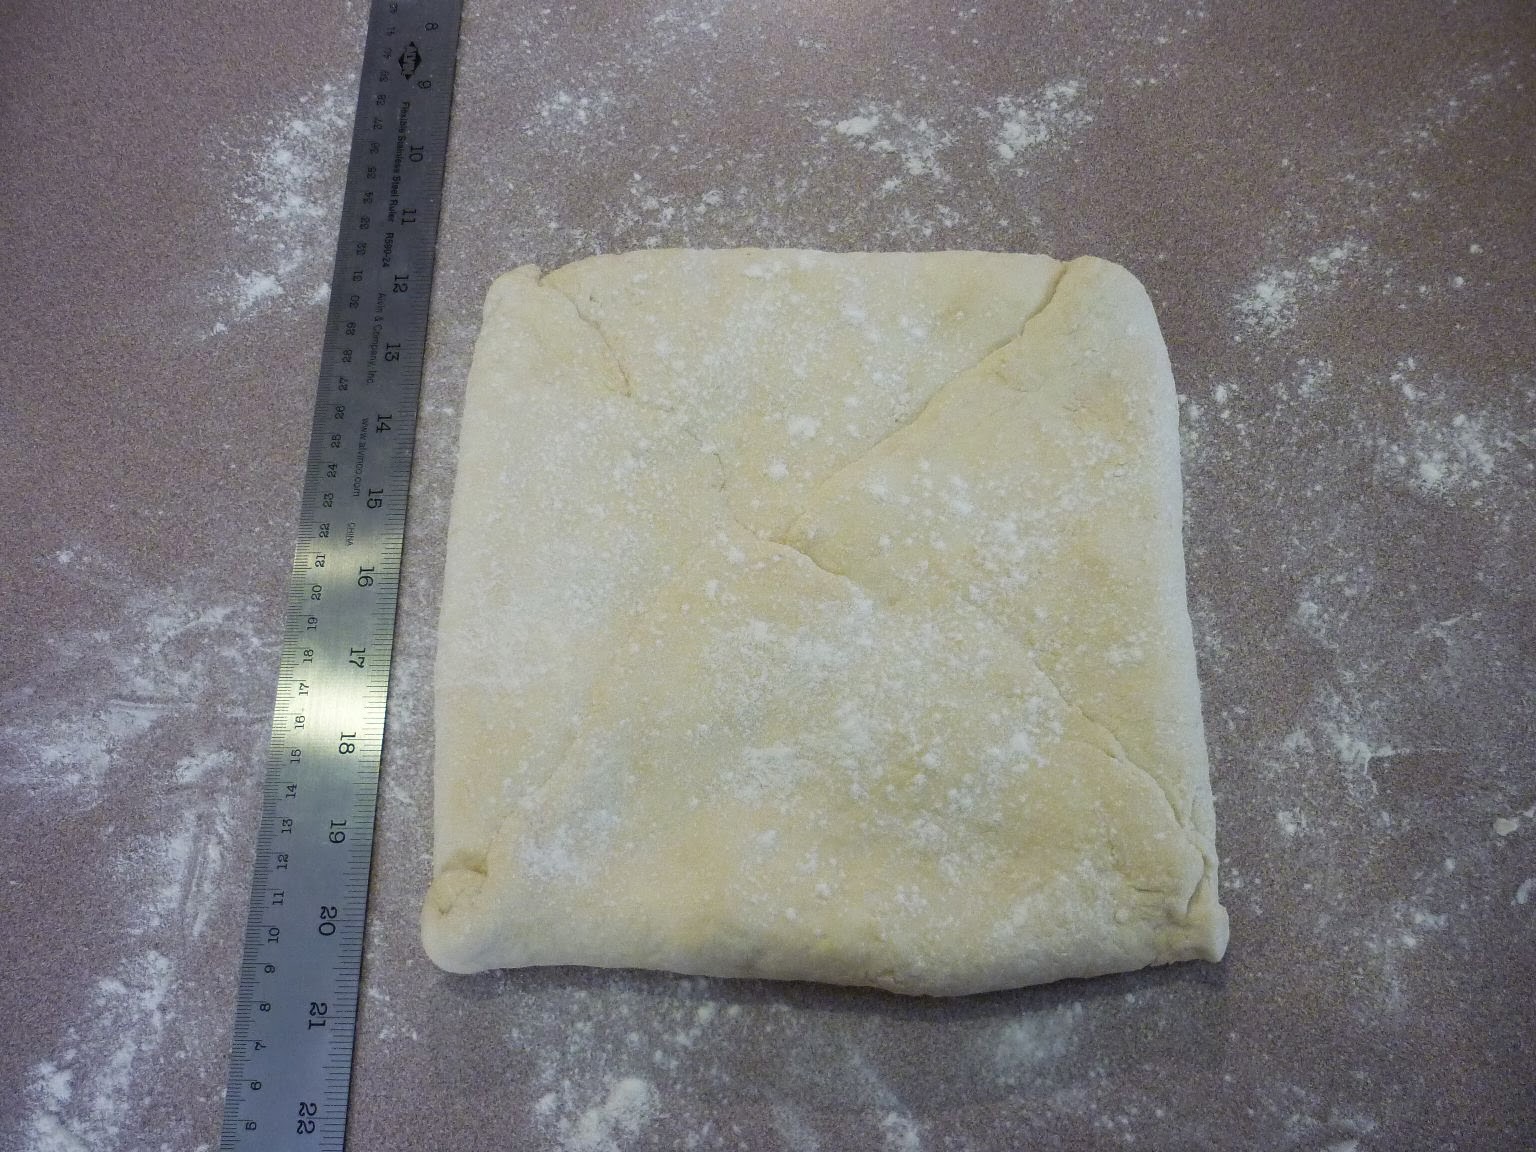
When the dough has come together, gently gather it and press it into a 4" square. Dust lightly with flour and loosely wrap it in plastic wrap. Let it rest for 30 minutes (or longer) in the refrigerator.

formed into a square and ready for resting

Step 2, make the butter square You should have 3 1/2 sticks of cold butter remaining. Cut into pieces and place in the bowl of a stand mixer. Using the paddle attachment, beat the butter until it is completely smooth.

paddling the butter

Scrape your softened butter into plastic wrap. Using the plastic wrap to protect your hands, shape the butter into a 4" square. This is where you want to start being careful with measurements, so try to be pretty precise here. If the butter square is too soft, chill it until it has firmed up. You want the dough and butter square to be the same firmness so they will roll out easily together. If the butter is too soft, it will ooze out of the dough and ruin your layers.

scraping out the butter

my butter square, ready to be chilled

Let the butter chill for a while. Basically, you want the butter square and the dough to be the same firmness, so they will roll out together, smoothly and without tearing the dough.

getting ready to roll out the first two turns

Step 3, creating "le petit paquet" or incorporating the butter into the dough Roll out your dough to an approximate 10" square. You can make the four corners slightly thinner (since they will be coming together and overlapping in the middle) and leave the middle slightly thicker.

my 10" square of dough

Place the butter square in the middle, at a diagonal, as below.

the butter square goes on top

Then fold the four corners of the dough so they meet in the middle, pinching the edges of dough together so you seal the butter completely inside. After this step, I use the heel of my hand to gently push/flatten the packet a bit. I am trying to make sure the butter reaches the edges and is evenly dispersed inside (but don't push too hard as you don't want to the butter to leak out at all).

my sealed petit paquet

Step 4, the turns Now comes the fun part...rolling out the turns. You will roll the dough twice, then chill it (first two turns); then roll it out twice again (turns 3 and 4), then chill it; then roll it out twice more (turns 5 and 6), then it is ready to shape and use.

Lightly flour your surface and gently roll out the dough to a 12x24" rectangle. Flour sparingly, but use enough so the dough does not stick to either the countertop or the rolling pin. You will find you need less and less flour as you go, but you do not want the dough to stick or the butter will break through. If the dough tears and exposes the butter, pat some flour onto the butter spot and keep rolling.

I've flattened the packet out slightly to make sure the butter is
evenly dispersed inside

During the rolling, it is important to try to be precise and to try to keep the dough as rectangular as possible. I have a 24" ruler that I use for baking and it's perfect for rolling out the dough. I just set it on the countertop and keep rolling until my dough is as long as the ruler.

phew...done

24" exactly!

Now you are ready to make the first turn. Fold the dough into thirds, as you would a letter.

fold the top down and then the bottom up

voila, the first turn

Now, rotate the dough so the opening is on your right and the folded side is on your left, as below.

turned and ready to roll out again

Roll out the dough again, as you did before, to 12x24" and then fold into thirds again. This is your second turn completed. Now the dough needs a rest.

the second roll...24" check!

fold again into thirds

Wrap the dough losely, but completely in plastic wrap (you don't want any air to get in which will dry out the dough), set it on a cookie sheet pan and let it rest in the refrigerator for a minimum of 30 minutes.

ready to rest in the fridge

After the first rest, you will need 4 more turns. Repeat the above process (two turns), then rest the dough again for a minimum of 30 minutes.

After a total of 6 turns, your dough should be smooth, soft, and absolutely gorgeous. Look how pretty it is!

my finished dough

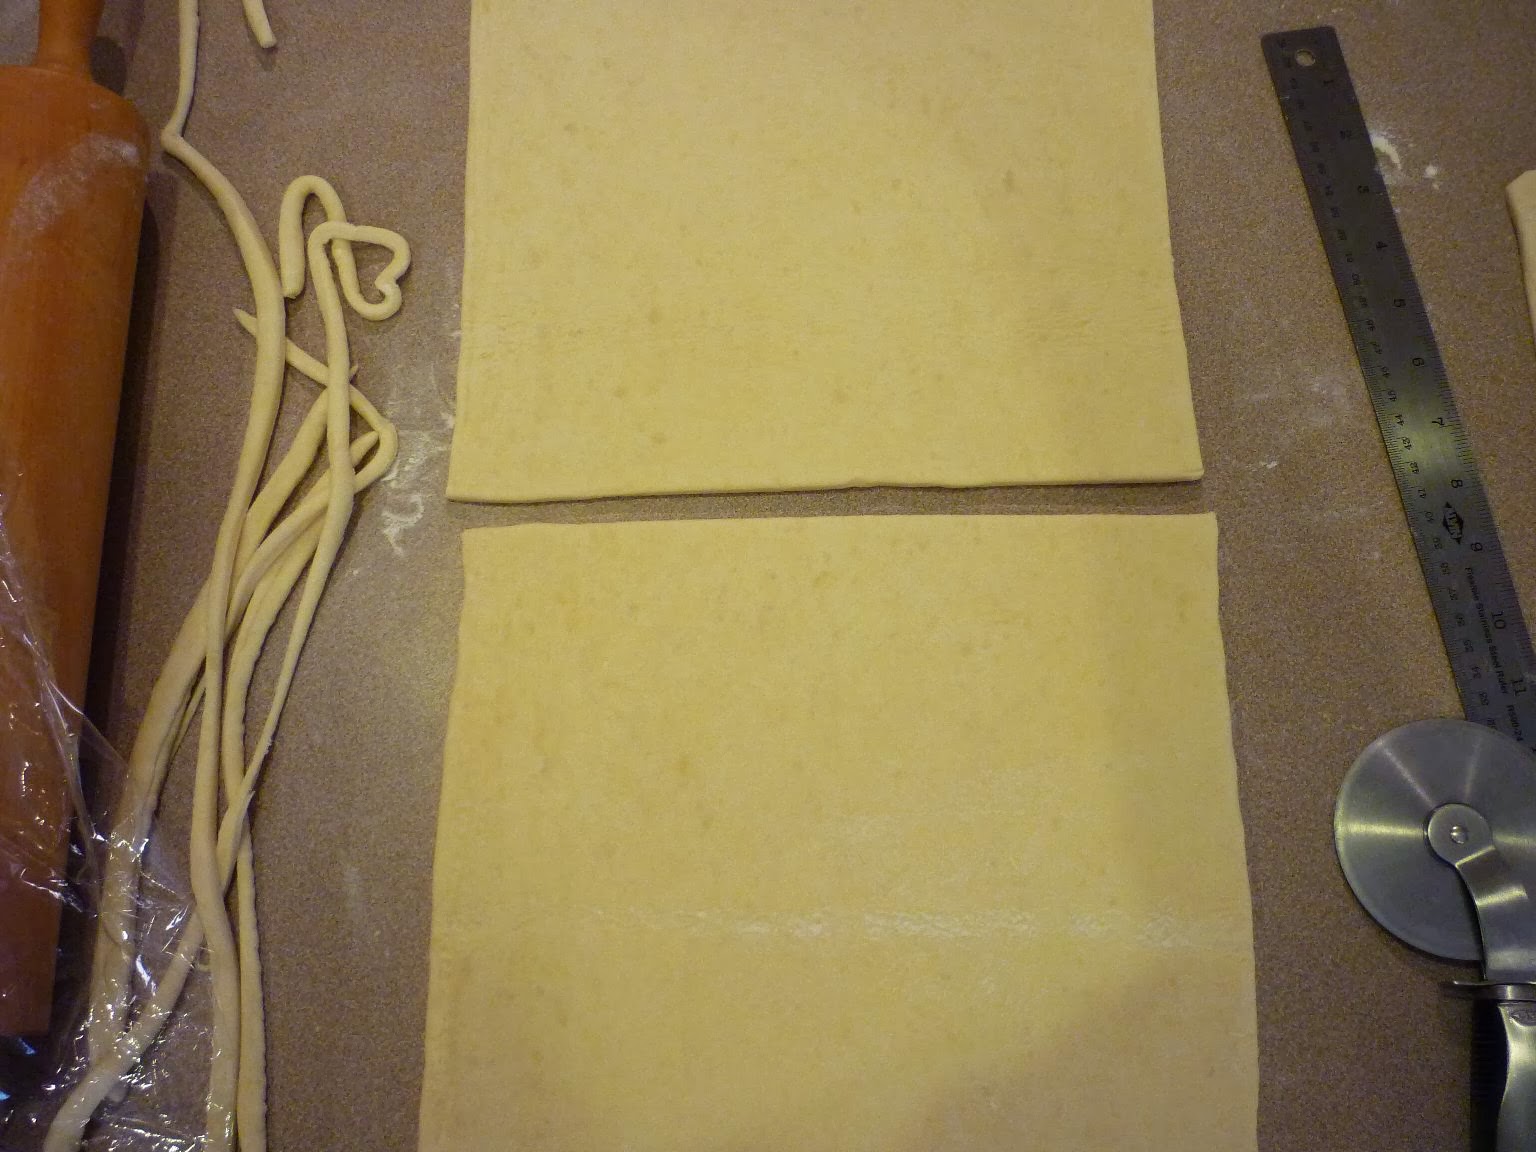
Now you are ready to roll out the dough and use it for delicious baking projects. The picture below is the dough measured out for my apple turnovers, which used 1/2 the dough. I used the other half of the dough to make an apple tart for Thanksgiving. The scraps are good for making cheese twists and/or palmiers.

For another batch of puff pastry I made a delicious dessert called pithiviers...so yummy! I made a second batch just a couple of weeks later, for Christmas...I have been a baking maniac the last two months.

measuring dough for apple turnovers and an apple tart


Bye for now...