Showing posts with label bread. Show all posts

Saturday, July 2, 2016

Milk Bread

Hello blog...I'm back! I've had a really busy couple of years working full-time and going to grad school, and the past year was especially busy as I was working and doing my clinical internship. But, I graduated in May (yippee!) and am now getting back into more of a regular schedule...which means, yay, more time for baking and blogging. I have a bunch of old photos from the past year or so, so I'll be playing catch up with several new posts.

Up first, Milk Bread!

look at this gorgeous bread...

yummy!

I love making bread from scratch. There aren't many things better than the smell of bread happily baking away, or a nice thick slice from a warm, homemade loaf fresh out of the oven slathered with butter and jam. Yum!

Last year I was on a bit of a bread-making kick and decided to try this delicious Asian milk bread recipe from The Woks of Life - a family-run cooking/baking blog. I discovered this blog last year when I made their amazing homemade Chinese BBQ pork and pork fried rice. They have tons of recipes and drool-worthy photos. I might have to make another round of the Chinese BBQ pork, the milk bread dough, and try their pork buns next. My mouth is watering just thinking about it!

But for today, here is my take on milk bread. The recipe is very easy - a few simple ingredients, mix them together, knead, rise, shape, rise again, bake, and eat! The bread bakes up to a lovely deep golden color and has a light, tender crumb.

mise en place - so simple!

everything gets mixed together

the first rise

the dough is shaped and set aside for the second rise

baked to a beautiful golden brown

so pretty!

the bread has a wonderful texture - light and airy

time to try a piece...

delicious!


Bye for now...

Sunday, August 2, 2015

Rose's Alpha Bakers: Whole Wheat Walnut & Raisin Loaf (bump)

I haven't had a chance recently to bake with my friends in the Rose's Alpha Bakers group, but I'm going to try to get back into the swing of things as the summer winds down (I can't believe it's already August!). This week's bake is Rose's 100% Whole Wheat Walnut Loaf. I made this bread (with a few tweaks) way back in February and it was absolutely delicious!

It quickly became a favorite and I made is about 5-6 more times during the long and seemingly never-ending New England winter we had this past year. It was the perfect winter bread - hearty but not heavy, tasty, and amazing when toasted up and topped with butter and honey.

My tweaks were to add a small amount of white flour and to add raisins. I also started making 1.5x the recipe so I could get two full loaves out of it. The first time I made it I got one loaf plus a few rolls so figured...why not increase the recipe slightly and get two loaves?

This bread is an all-day affair as the starter takes about 4 hours and then there are two rises. I tried once to start the dough the night before and finish it the next morning, but I didn't like that loaf as much so went back to waking up early to start the loaf and finishing it around lunchtime of the same day.

I highly recommend making this bread! Delicious.

yummy and healthy!

delicious with butter and a bit of honey

nothing better than homemade bread on a cold winters day!


My full post for my tweaked loaf that I called Whole Wheat Walnut & Raisin Loaf, plus lots of pictures, is here.

Bye for now...
 

Sunday, February 8, 2015

Rose's Alpha Bakers: Whole Wheat Walnut & Raisin Loaf


It's catch-up week for Rose's Alpha Bakers. Instead of making a recipe I missed, I decided to try something healthy this week and made the 100% Whole Wheat Walnut Loaf from Rose Levy Beranbaum's The Baking Bible. I made a few small changes though - adding a bit of white flour and some raisins - so I'll call mine a Whole Wheat Walnut & Raisin Loaf. It was a mostly whole wheat loaf that was 100% delicious!

While I am enjoying baking through The Baking Bible, I am really feeling the need to be more healthy...so I've just purchased Rose's The Bread Bible and will be making more breads and fewer sweets. I'll still be baking along with my online buddies (as evidenced by next week's chocolate cake, which I've already made!), but - here in Massachusetts - we've been digging out from one storm after another and making fresh bread from scratch while I'm stuck in the house feels like an awesome winter project.


my finished loaf and dinner rolls

You can see here that the loaf baked up with a nice light crumb. It was hearty, but not heavy.

a view of the inside

lovely fresh rolls

Overall, the bread was amazing. It was easy to make (although it took all day) and the taste was delicious. I felt so healthy eating it! It also made so much dough that I could make a full sized loaf plus eight rolls.

I was a bit nervous about using only whole wheat flour because I feared the bread would be too dense and heavy, so my loaf doesn't look much like the picture in the book. Rose's bread (in the book) looks almost like a Boston brown bread to me - very dark in color with a tight crumb. My loaf is lighter in color and slightly fluffier inside. The addition of raisins also kind of threw off my senses and I was expecting it to be slightly sweeter, so next time I think I would add a bit more honey to the dough or just use nuts and no raisins. Turning it into some kind of cinnamon-raisin-walnut bread would also be yummy.

The first step in making the bread is making a "sponge," a starter dough that adds structure, flavor and texture to the final bread. I let mine rise for the full 4 hours (with the rest of the flour sprinkled over the top) to get the best flavor possible.

ingredients for the sponge - so easy!

the sponge was really liquidy

One of the ingredients was vital wheat gluten. I'd never even heard of this before, but was glad I found it at the grocery store! I don't know if it was just a great recipe or the addition of the vital wheat gluten, but this bread was really great! A definite make again recipe.

ingredients for the bread

hmmm...so this is what vital wheat gluten looks like!

the dry ingredients are mixed together

After mixing the starter ingredients, the rest of the dry ingredients are mixed together and sprinkled over the top of the sponge like a thick flour blanket. Then the dough rests for 1-4 hours.

sprinkle sprinkle...see you in 4 hours!

After 1 hour, small cracks have formed in the flour "blanket." After 4 hours, there are lots of bubbles all around the edges. Baking with yeast is so cool - it's alive (said in Dr. Frankenstein's voice)!

after 4 hours...bubbles everywhere

so cool - a science experiment in my bowl

After four hours of resting, the dough gets mixed together then the oil and salt are mixed in. I was a bit worried at this point because it seemed really oily...but, of course, it turned out fine.

After that, the raisins and walnuts are mixed in, then it gets the first rise.

mixing everything together...a bit oily now, but not for long

in go the raisins and walnuts

and another very brief mix, to incorporate everything

Time for the first rise. The dough goes into my lovely dough-rising-bin.

there is always that nervous moment...will it rise properly??

yahoo, it rose! Beautiful.

After the first rise, the dough is turned out - look at all those beautiful air bubbles! - gently deflated, and back in the bin for another rise.

gently deflating the dough

and giving it a gentle knead

Time for the second rise...

after about an hour, it's done

Then the dough is turned out again, shaped, and put in the pan for the final rise. To shape it, it's rolled up and placed in the pan, seam side down.

rolling...

...rolling....

and pinching the seams

into the pan for the final rise

I thought there was way too much dough to fit into my bread pan so I split it in half for the loaf and to make 8 rolls.

roll dough, ready to be shaped

into the pan for rising

After the final rise we're ready for baking. Yum!

beautiful dough!

golden brown rolls

look how pretty they are!

a bit of butter and we're ready to go

gorgeous loaf on the outside...

...and in the inside!


Bye for now...

Wednesday, January 1, 2014

Parker House rolls

I have been in the mood for some fresh, soft bread rolls lately, so I made these super buttery Parker House rolls earlier this week.

light and delicious rolls

The rolls originated in the Parker House hotel right here in Boston (wicked awesome)! The original Parker House rolls recipe calls for using round cutters, but I adapted my recipe from Bon Appétit's and followed their method, where you roll out the dough and cut it into a rectangle shape. It was a bit tedious to roll, cut, butter, and fold 36 rolls, so I would probably use a different shape if I were to make these again.

Overall, the dough was very easy to work with and the rolls themselves were light, soft, and buttery. I definitely recommend trying these rolls (but skip the time-consuming rolling and folding). I would recommend instead to either skip the inside buttered layer or to perhaps roll out the whole dough, cut it into thirds lengthwise, butter that, fold it and then cut that up. I think that would go much faster. Here is my recipe, adapted from the Bon Appétit recipe.

Ingredients
2 1/4 t. active dry yeast
1/4 c. warm water (110-115 degrees), to proof the yeast
1 c. whole milk
1/4 c. unsalted butter, cut into pieces
3 t. sugar (add a pinch to the proofing yeast)
1 1/2 t. sea salt
1 egg, at room temperature
3 1/2 c. all-purpose flour, plus more for rolling out the dough
another approx. 1/4 c. unsalted butter, melted, for brushing the dough and baked rolls

Using the melted butter, butter two 9x9" pans, or you can use a 9x13" pan; set aside.

See below for the method.

mise en place - easy, simple ingredients

Proof the yeast in a small bowl by combining the yeast, warm water and a pinch of sugar (to feed the yeast). Set aside for 5 minutes.

foaming yeast...smells yummy

Heat the milk, butter, sugar, and sea salt (whisking to blend) until warm and the butter is almost melted; pour into a large bowl. Add the yeast mixture and egg; whisk to blend.
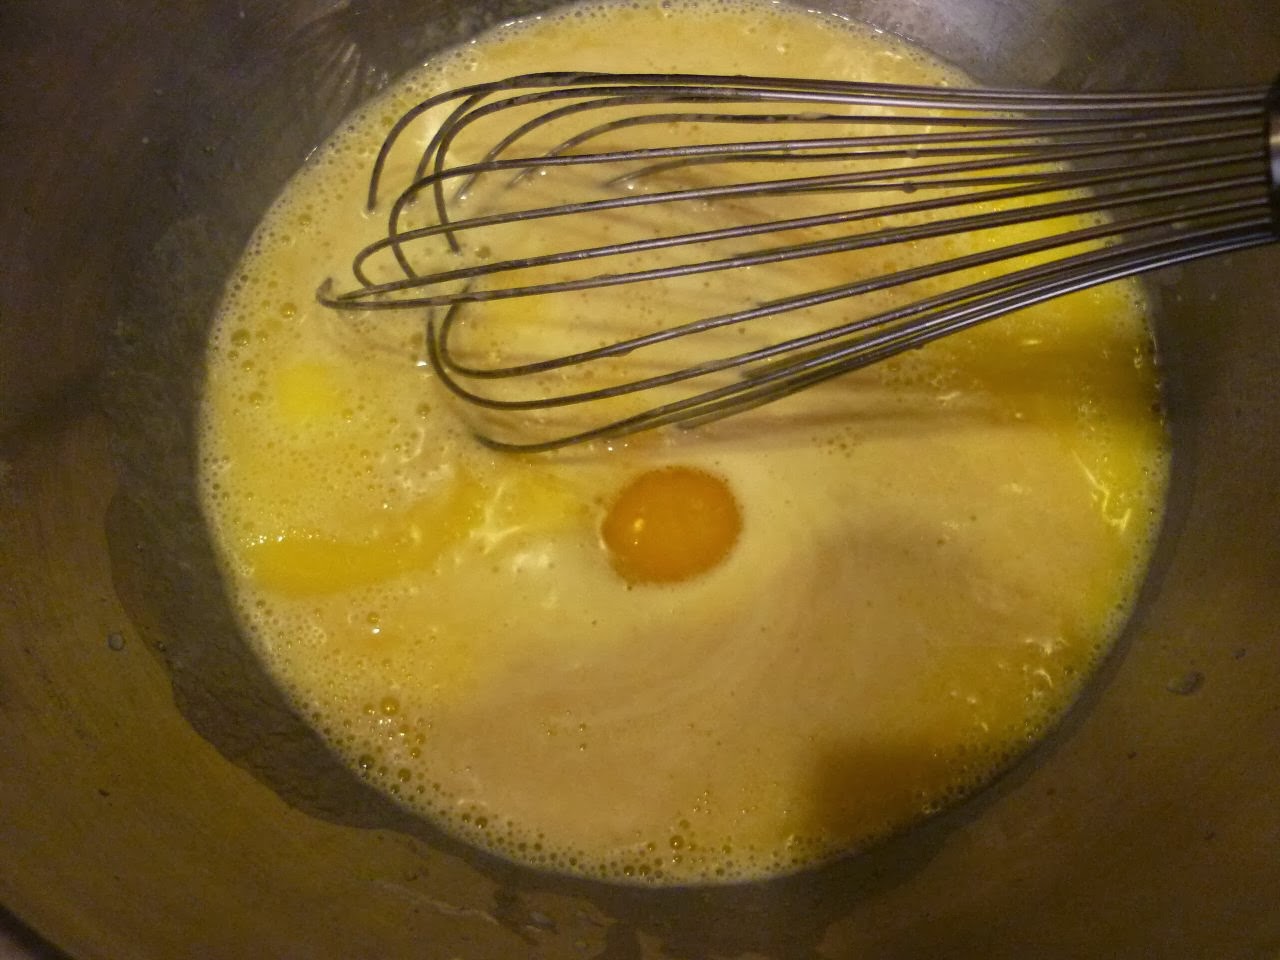
combining the wet ingredients

Add the flour all in one go. Mix quickly with a large spoon until the dough starts to come together.

adding and mixing in the flour

Turn the dough out onto a floured surface and knead for about 5-6 minutes. It will be very sticky at first, but keep kneading until it is smooth and elastic.

From this:

very sticky to start

To this:

soft and smooth to end

Oil a large bowl and transfer the dough to the bowl, turning the dough over so it is lightly coated with oil. Cover with plastic wrap then a large kitchen towel and set in a warm place to rise until it has doubled in size (about 90 minutes or so, depending on the temperature of your kitchen).

the oiled ball of dough is ready for the first rise

risen and doubled in size! So pretty

Gently deflate the dough by punching it down; turn it out onto a lightly floured surface and divide into four equal pieces.

the deflated dough is ready to be rolled out

Roll out each piece of the dough into a rectangle about 12x6" then cut into 12 equal sized pieces. You should end up with 12 pieces, each approximately 4x2"

the 12 squares that will become the rolls

Butter one half of each small rectangle of dough and then fold the unbuttered half over so the "tail" of the unbuttered dough hangs slightly over the buttered half; see the next two photos.

butter half the dough

then fold the unbuttered half over

Layer the folded-over rolls in the baking pan so they are staggered and slightly overlapping, and with the unbuttered "tail" underneath the roll that is on top. It is hard to describe, so see the next two photos.

Repeat this process (rolling out, cutting, buttering, folding, layering) with the remaining 3 pieces of dough. This is the part I felt took too long. Next time I'll shape them differently so this is faster.

one pan of the buttered and folded-over rolls

the rolls sit slightly on top of each other, on the "tail" end

The rolls don't look like much at this point - so flat and lifeless - but after they rise again they will look much more like real rolls. Cover the pans of rolls with a kitchen towel and set them aside for the second rise (about 45 minutes). Toward the end of the second rise, preheat the oven to 350.

After the second rise, gently brush the rolls with melted butter. Bake at 350 for 20-25 minutes until they are golden brown.

after the second rise, gently brush with melted butter

Immediately after taking the rolls out of the oven, brush again with melted butter and sprinkle with large flake sea salt. Serve warm.

beautiful golden brown rolls

a side view...you can see how they puffed up as they expanded during
the second rise and baking

light and tender - and buttery! - inside

Bye for now...