Showing posts with label almonds. Show all posts

Friday, July 15, 2016

British Madeira Loaf Cake...on your marks, get set, BAKE!

My husband is British (a Geordie) so we watch a lot of British TV, mostly comedies and crime dramas or murder mystery-type shows (stay away from Midsomer...deadliest place in all of fictional Britain!). His Geordie accent has faded through the years, but you can hear some awesome Geordie accents here, here, and here. I love the accent, wye aye, of course, but it's canny impossible to imitate! When he first moved to America, people had no idea he was from England and usually guessed Australia, which is funny to me because the Geordie accent sounds nothing like an Australian accent. But, I digress...

One of our favorite food-related shows (British or not) is The Great British Bake Off...on your marks, get set, BAKE! No Geordie accents there, but lots of fun bakes and kitchen mayhem in the tent. I decided that I might try to bake some of the recipes from the show as we watch each week (although I'm already a week behind in posting this!). In the first episode, one of the bakes was a Madeira loaf cake. I love anything with almonds and lemons, so I decided to try it.

I was planning to follow the Madeira loaf cake recipe from this BBC Good Food recipe, but I had to make some small changes because I had no all-purpose flour (how on earth did that happen?!) or self-rising flour that the recipe called for...so I had to create my own regular flour using cake flour and bread flour; then I had to make self-rising flour by adding baking powder, and salt. A poster in the comment section on this site recommended converting bread flour and cake flour to all-purpose by using 6.25% of the total weight bread flour to the rest cake flour, so that's what I did, and then had to add leavening ingredients to create self-rising flour. Way more complicated than if I had the correct flour, but a fun experiment in substitutions and the awesomeness of the internet.

In addition to the issues with the flour, I also doubled the recipe, so I could slice and freeze one loaf, used more zest, a bit more egg, and added a bit of muscovado brown sugar, so I am including my slightly altered recipe here. Go here for the original.

gorgeous loaf - light and tender


The recipe is interesting because it doesn't call for any liquid! Most cake recipes call for milk or sour cream to offset the dry ingredients. This one didn't though, so it was a very easy cake to make...no 'starting and ending with the dry ingredients' business. Sadly, neither of my loaves rose properly in the center and I didn't get the required open crackle dome top. I think this could be because of the changes I made to the recipe, all of the issues with making my own flour, or because I baked two loaves side by side and perhaps there wasn't enough airflow in the oven. However, even though it was lacking the signature crackle, the cake was delicious - a hint of the ground almonds and a hint of lemon. It reminded me of a light pound cake with a dense but really tender crumb. It would be a perfect addition for a tea party, or even to just make ahead, freeze and then thaw a slice or two for company. Twenty seconds in the microwave brings a slice back to life, warm and fresh.

Ingredients
375g cake flour

25g bread flour
3 3/4 t baking powder
3/4 t salt
(alternately, use 400g of self-rising flour instead of the 4 ingredients above)

100g ground almonds


350g butter, softened
350g (minus 1 T) caster sugar or superfine sugar
1 T muscovado brown sugar
6.5 eggs
zest from 3 small lemons
2t vanilla extract
a splash or two of milk, if needed

Method
Preheat the oven to 325º and prepare two loaf pans by greasing with softened butter. I also used a strip of parchment paper on the bottom of the pans. Set the pans aside.


mise en place - so simple!

Combine the first four dry ingredients (cake flour, bread flour, baking powder, salt) in a large bowl and mix thoroughly; add the ground almonds, mix well, and set aside.

Using the paddle attachment on your stand mixer, cream together the softened butter, caster sugar, and muscovado brown sugar. Beat for about 5 minutes until very pale in color and increased in volume (see picture).

but butter and sugars, pale and fluffy

Add the eggs, one at a time, beating well after each. This will add the volume to your cake.

adding the eggs and more mixing

look how pretty! Light, fluffy...
Next, add the lemon zest and the vanilla. I'm using my own homemade vanilla :)  When I've made vanilla more recently, I've added more pods to the bottles than in my original post that I linked to. It "cooks up" into vanilla much faster and has a more aromatic essence to it - I definitely recommend going in strong with the beans.

adding the vanilla and lemon zest
Next, mix the ground almonds and flour mixture together, then add slowly to the butter/sugar/egg mixture.

mixing the flours and ground almonds together

beating in the dry ingredients
The batter will be thick, but should be loose enough to drop off a spoon. If it's too thick, put the mixer on low speed and mix in a few splashes of whole milk until it thins out slightly.

Spoon half the batter (I weighed mine to try to get the loaves as equal as possible) into each of your loaf pans; smooth the top of the batter.


Bake at 325º for 25 minutes, rotate pans, bake for additional 30 minutes or until a toothpick stuck into the center comes out clean. Rotating the pans (i.e. taking them out of the oven briefly) may also be a reason for the non-crackling tops...you could try to not rotate them and see if that improves the crackling situation.

Cool in the pan for 10 minutes, then gently remove the loaves from the pans to a wire rack and cool completely. Slice and enjoy with a cuppa!

almost, nearly wanted to crack...so close, but nope!

a close-up of my non-cracked tops :(

the crust is a gorgeous golden brown color

and the inside has a light and tender crumb

yummy!


Bye for now...

Wednesday, December 24, 2014

Rose's Alpha Bakers: Almond Coffee Crisps, part II

After my epic canelé post from yesterday, here is a short and sweet post about a second take on some delicious cookies.

Last week, in week four of my Rose's Alpha Bakers group, was the delicious, light and crunchy Almond Coffee Crisps from Rose Levy Beranbaum's The Baking Bible.

I enjoyed them so much that I decided to make the recipe again to give to my family on Christmas. However, this time I used some cocoa powder instead of espresso powder since some family members dislike coffee. Ta da...here are my Almond Chocolate Crisps. They are very similar to the Coffee Crisps...except chocolatey, as you'd expect :)  I highly recommend this (and the original) recipe. It's very quick to make and the cookies are delicious!

Almond Chocolate Crisps - all bagged up and ready for gifting

Almond Coffee Crisps on the left; Almond Chocolate Crisps in the right

I only took a few photos from yesterday's Almond Chocolate Crisps, but you can see the step-by-step photos of the original Almond Coffee Crisps here.

I used some cocoa powder instead of espresso powder

the cocoa is so fine that it blended too well into the flour, so I didn't get any
of the pretty speckles that I had with the coffee version

which to eat first, coffee crisp or chocolate crisp...dilemma, dilemma!


Bye for now...

Sunday, December 21, 2014

Rose's Alpha Bakers: Almond Coffee Crisps

The latest in my whirlwind baking adventure with my fellow Rose's Alpha Bakers is Almond Coffee Crisps from Rose Levy Beranbaum's The Baking Bible. The cookies are buttery and flaky; and because they are made without eggs, they are very delicate and melt in your mouth.

crispy with a hint of coffee flavor

Rose described these light and crumbly cookies as "crisp, fragile, ethereal" and they really are. I'd advise making these when you're going to serve and eat them all because they are very delicate (I broke two just lifting them from the baking sheet...you might think I did this on purpose so I could eat them, but that was just a lucky coincidence!). They were also very fast and easy to make, another plus.

These cookies would go wonderfully with coffee or tea...a tea party, perhaps? I'd love to have a little tea party and serve finger sandwiches, scones with clotted cream and jam, cookies, tiny pastries, and, of course, tea! These delicious cookies would fit in very well on my tea party sideboard!

mise en place for the cookies - so simple!

I was a little skeptical that the tiny bit of ingredients above would make 36 cookies...but, of course, they did (note to self: never doubt Rose!). The cookies spread quite a bit when baking, so what starts off as little cookies rounds when raw bakes up to nice 3" cookies when baked.

I decided to skip the final step of dusting each cookie with more espresso power. I wasn't sure if that would be coffee-overkill, or just make a mess. Either way, I'm glad I skipped it. There is still a hint of coffee flavor, but it's not overpowering. Overall? Yum! 

I processed the toasted almonds with a few tbsp of the flour mixture until finely ground
and then added the rest of the flour mixture and processed again

the result is similar to almond flour

the sugar and butter are creamed until smooth

then the flour is mixed in...

...and pulsed until the dough comes together

the finished dough is kneaded a few times to make sure all of the butter
is completely mixed in. The dough is extremely easy to make and work with.

tiny little balls of dough are measured out - 10g each...so small!

all of my balls of cookie dough

a dozen balls of dough placed on the cookie sheet...

...and then pressed into flat rounds

they spread quite a bit when baked, into thin, crisp cookies

and done! A delicious plate of almond coffee crisps

time to make a pot of coffee and enjoy a cookie


Bye for now...

Sunday, December 14, 2014

Rose's Alpha Bakers: The Ischler

It's week three with Rose's Alpha Bakers and up this week is The Ischler. The Ischler is a light, flaky, almond cookie, traditionally made with a layer of both apricot lekvar and a thick chocolate ganache as the filling. I was in a time crunch this weekend (end of the semester paper time!) so I opted to just make the chocolate ganache filling. Next time I will make the apricot lekvar because the recipe looked delicious!

I think I'll call my cookie The Modified Ischler.

Yummalicious! A light nutty flavor, a very tender cookie, and chocolate. A win-win.

Rolled cookies are generally not my favorite to make...rolling...waiting...rolling...waiting. I'm too impatient! However, these cookies were pretty easy to make and I had them done in about 4 hours on Sunday morning.

The cookie itself tastes very similar to my all-time favorite Christmas cookies. If you like either making or just looking at pictures of gorgeous decorated cookies, I highly recommend the book Cookie Craft: From Baking to Luster Dust, Designs and Techniques for Creative Cookie Occasions.


powdered sugar and almonds are processed until fine

so far, so good, until...

opps...made a mistake and added the egg and vanilla before the butter...
It was early Sunday morning, I guess I was still half asleep!
Instead of trying to mix it, I just tossed in the butter and hoped for the best.
It came out fine in the end :)

flour is added and the dough is pulsed until it is crumbly and comes away from the bowl

I added a bit more flour here (about 2 T). The recipe says that the dough will be sticky, but mine was super sticky because I had a hard time measuring out 1/2 of an egg. Even with my scale, I couldn't get 22 grams perfectly, so I ended up using a bit more egg than was called for. This resulted in my dough being very wet, so I added a bit more flour to get it to form a ball in the above step.


the dough is divided into 4 parts, pressed between plastic wrap and then refrigerated...
I actually just rolled mine nearly all the way to save time later

after 2 hours of chilling, it gets a final roll and then it's ready to cut

a quick bake and they're done! They smell fantastic.

the cooled cookies and ingredients for my chocolate ganache

the chocolate pieces are melted and the hot cream is stirred in...
voila, smooth and silky ganache

so cute! I love the chocolate peeping out...

delicious! Light and flaky with a bit of chocolate.


Bye for now...

Friday, July 18, 2014

Homemade puff pastry becomes...pithiviers

Hello blog! It's been so long since I've posted. I apologize to any readers who may have visited me this spring and summer. I've been so negligent and really do miss posting. It's just been difficult keeping up with full-time work, graduate school, trying to be healthier, have a happy marriage, and on and on.

But, it was my birthday last week and I had a dinner party for family and friends and cooked and baked up a storm. So I'll be posting those pictures soon. My garden is also blooming away and I took a trip to Iceland in the spring...so lots to catch up on! Even though I haven't been posting much lately, I do think of my lonely blog and any readers who may be visiting. Don't give up on me!

Getting to the point at hand for this post...pithiviers!

my freshly baked pithiviers

Have you heard of this dessert before? Me neither! However, during my puff-pastry making obsession over the winter, I was looking for something else fun to do with some of the puff pastry and I found this amazing pastry creation. It's puff pastry on the outside and delicious almond cream on the inside. So yummy.

The almond cream recipe is courtesy of Chef Delphin Gomes and comes from one of the baking classes I took many years ago at the Cambridge School of Culinary Arts. It's very simple!

You'll need 1 pound of puff pastry (see my recipe for puff pastry here), 1 recipe almond cream (below), and 1 lightly beaten egg for the egg wash.

Almond Cream
8 oz granulated sugar
8 oz unsalted butter, room temperature
4 large eggs
8 oz almond flour (see directions below)
2 oz all-purpose flour

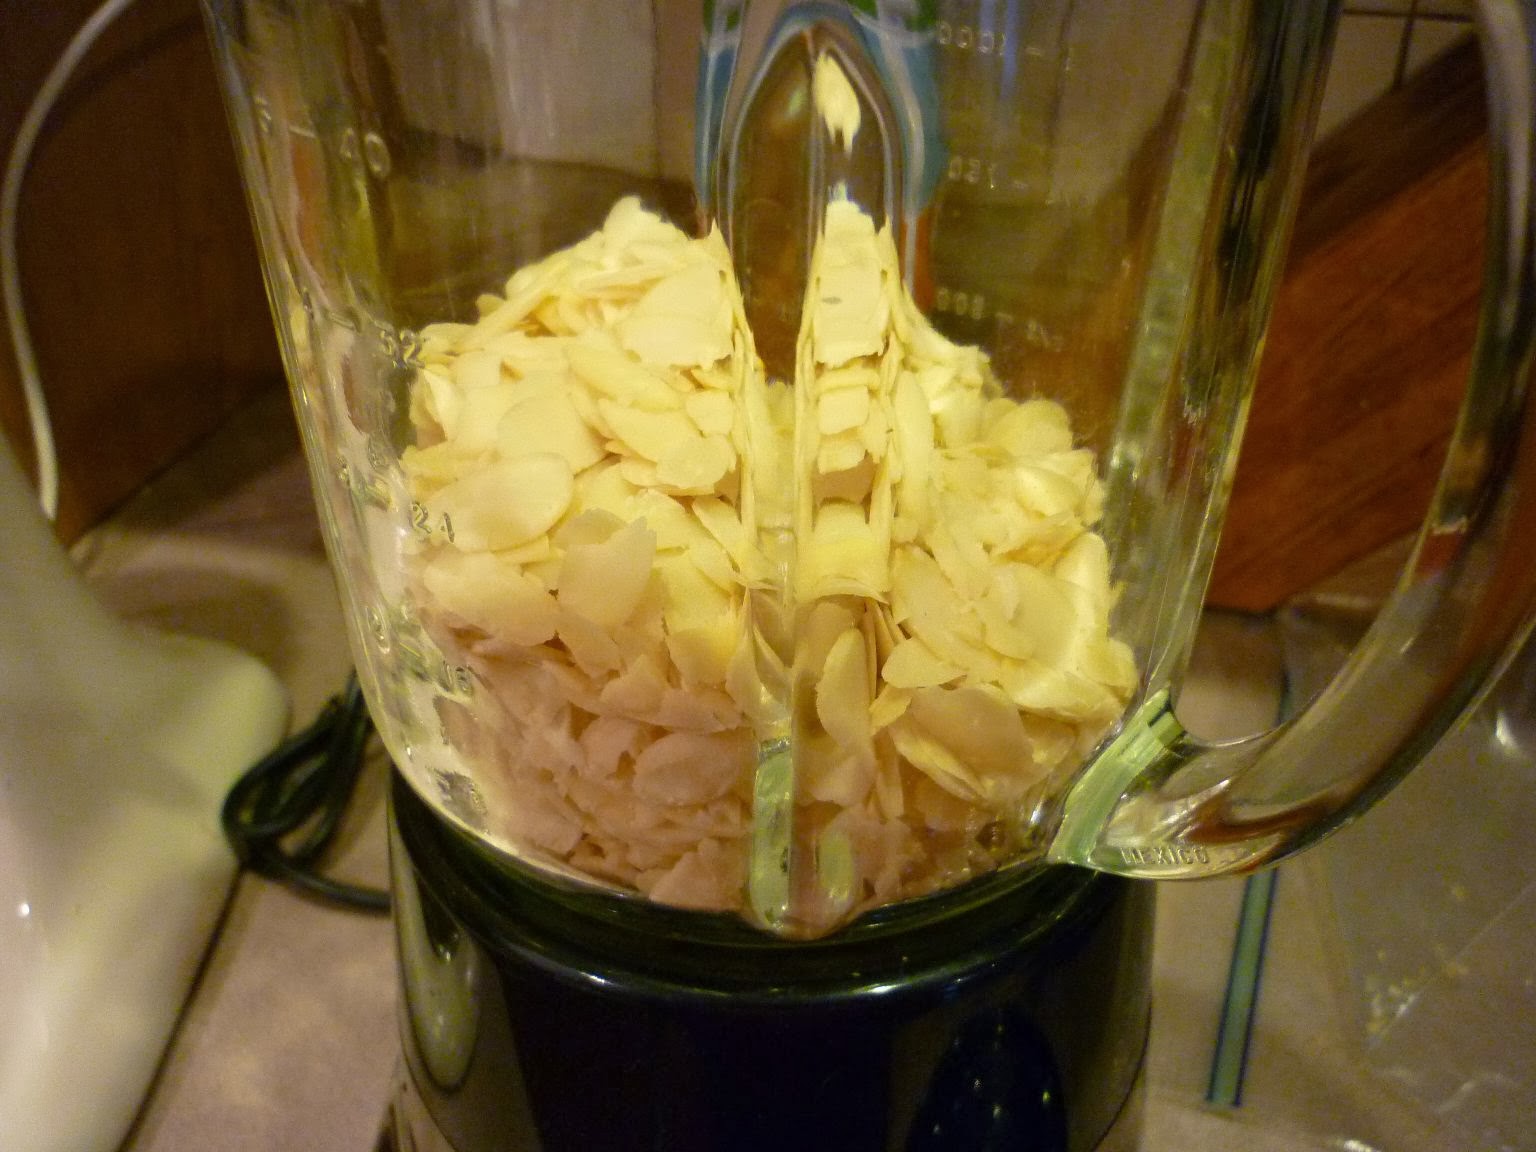
To make the almond flour, put blanched almonds in a blender and pulse until crumbly and "flour-like." It's easier to do this in small batches. Make 8 oz worth and set aside.

mise en place for my delicious almond cream!

first...making the almond flour. Grind small amounts of almonds in a blender...

...until it looks like this - sandy, light and fluffy

To make the almond cream, cream the sugar and butter (beat in a stand mixer with the paddle attachment) until light and fluffy, about 3 minutes.

Add the eggs, one at a time, beating well after each.

Mix the almond flour and all-purpose flour together and then slowly add to the egg-sugar-butter mixture. And...that's it!

For the pithiviers filling, line an 8" tart ring with plastic wrap, and scrape the almond cream into the ring. If you don't have a tart ring, use a 8" pie plate or just draw a circle on parchment and use that as a guide. Then simply spread the almond cream to fill the 8" circle. Refrigerate for at least 1 hour.

making the pithiviers filling

use an offset spatula to smooth the top

chill and then remove the tart ring

While the almond cream is chilling, roll out your puff pastry. You want two circles, one at least 1" larger than the other. I used a 9" tart ring to make the smaller circle and a bowl with a 10" mouth to make my larger circle. Chill your puff pastry circles for about 15 minutes.

tracing the 10" circle

the bottom circle of pastry, 9" around

and the top, 10" around

Now, we assemble. Using something solid for your base (I used a cooling rack covered in aluminum foil), place the smaller puff pastry circle down first. Next, peel back the plastic wrap from your chilled almond cream disk and place it in the middle of the 9" puff pastry.

my almond cream round goes in the middle of the puff pastry base

Next, place the larger round over the top and seal the edges with the egg wash. Brush the entire top with the egg wash. Be careful not to let the eggs drip over the cut edges of the pastry or the layers will not puff properly. Refrigerate for 30 minutes.

sealing the edges...don't let the egg drip over the sides

After chilling for at least 30 minutes, use a sharp knife to carve a design in the top dough. Mine is a bit messy, but not bad for my first try! Be sure to cut a hole in the middle to allow steam to escape.

Refrigerate for another hour or two (at least). You can also freeze the dough at this point, which is what I did. Before you bake the pithiviers, give it a final egg wash. Again, be careful not to let the egg drip over the edges.

a bit off-kilter, but here's my free-form design

Bake at 375 degrees for about 40 minutes, or until puffed up and golden brown. Let cool for about 10 minutes before slicing and serving. So beautiful! Next time you go to a dinner party, volunteer to make dessert. Bring this to the party - frozen - and bake it while you're eating dinner...your friends will be impressed! I served mine at a family holiday party and it got rave reviews!

my golden brown pithiviers

time for a slice...flaky pastry and light and delicious almond cream filling

With my leftover dough and almond cream (and some chocolate chips added!) I made 3 small, individual-sized pithiviers with different designs in the top dough.

cutting out and filling the dough for the small pithiviers

a flower pattern

the one on the bottom left is a bit wonky, but it baked up fine

voila!

look at all those layers...

all the chocolate chips sank to the bottom during baking

but it was still delicious! Chocolate and almonds are a perfect combination.


Bye for now...