Showing posts with label breakfast. Show all posts

Friday, August 22, 2014

Apropos of Nothing: A Hearty Winter Breakfast

As the title says...this is apropos of nothing. I just thought this hearty breakfast from last winter looked so delicious that I wanted to share. It's a bit "do you want any breakfast with that bacon" but hey...it's bacon!

oh, yum!


Bye for now...
 

Friday, May 10, 2013

Homemade Granola: Maple Pecan with Raisins

My husband has been on a granola kick lately and - in an effort to save money and control what goes in it - we decided we'd try to make our own. Oats, honey, raisins, nuts...I figured it couldn't be too hard, right? Right! It was easy, inexpensive, and yummy! I brought some to work and have been eating it with yogurt. And, it's delicious with milk, of course! It's also nice because a little goes a long way and is very filling.

It's is also one of those recipes that is completely flexible. Since I hadn't made it before, I wanted a recipe to go from so I wouldn't make any major mistakes, so my recipe below is adapted from the wonderful David Lebovitz. My husband made a different version, adapted from Alton Brown's recipe. My recipe (below) has pecans, raisins, maple syrup, and I tried using Lyle's Golden Syrup instead of honey. At first, when fresh out of the oven, it tasted way too apple-cinnamonny, but the next day that strong apple-cinnamon flavor had dissipated and I liked the flavor a lot more. My husband's recipe has almonds, walnuts, brown sugar, and sunflower seeds. He eliminated the maple syrup and coconut and used walnuts instead of cashews from Alton Brown's recipe. We also both thought that recipe had too much salt.

Homemade Granola: Maple Pecan with Raisins

Preheat oven to 300 degrees and set aside a sheet pan (jelly roll pan, with edges). I also love parchment paper - easy cleanup! - so I also used some parchment paper on the pan.

Mix the following "dry" ingredients (except raisins) in a large bowl:
3 c. old fashioned oats (not quick cooking)
2 c. pecans, roughly chopped
1/3 packed brown sugar
approx. 1/8 c. sunflower seeds, more/less to taste (I only used a bit as I'm not too partial to them)
approx. 3/4 t. ground cinnamon, to taste
approx. 1/4 t. ground ginger, to taste
approx. 1/2 t. salt
1 c. raisins, added during last 10 minutes of baking

Mix wet ingredients in small bowl:
approx. 1/3 c. unsweetened applesauce
approx. 1/3 of 1/3 c. Lyle's Golden Syrup (or honey), see below for screenshot of how much I used
2 T. pure maple syrup
2 T. oil (I used safflower)

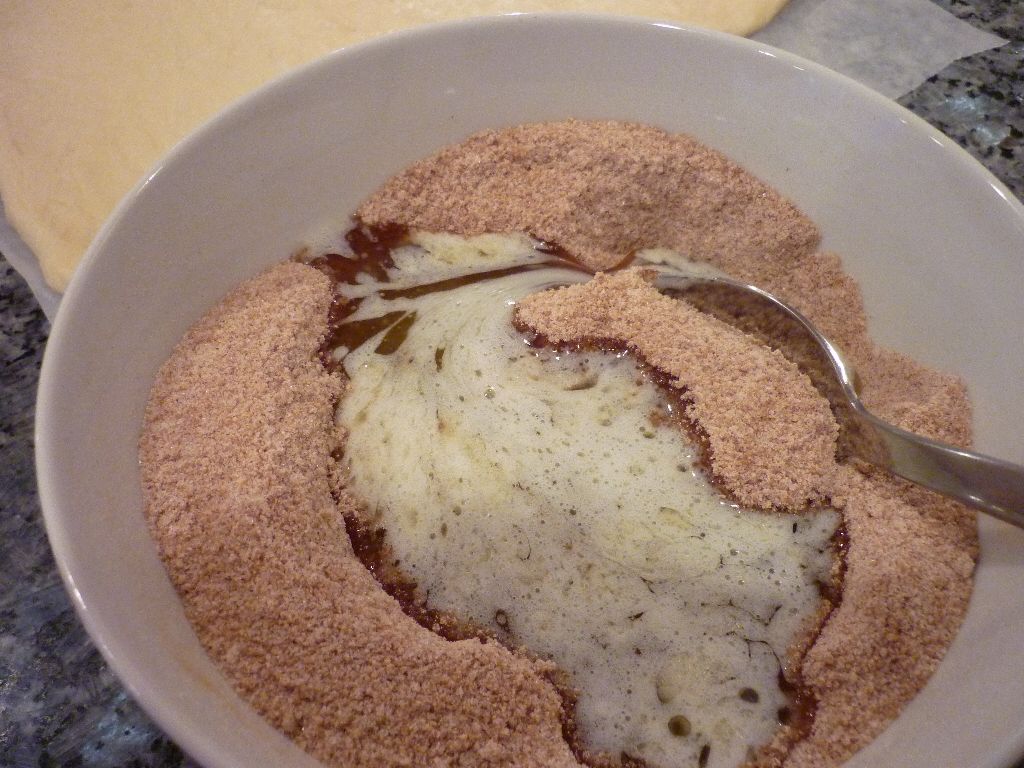
Add wet ingredients to dry and mix well with a spatula or large spoon until completely covered. It won't seem like enough liquid but it will eventually coat the dry ingredients.

Spread evenly onto a sheet pan and bake for about 1 hour, stirring well every 10-15 minutes. Add the raisins for the last 10 minutes only or they will burn. The raisins will puff way up and look like re-inflating grapes, but they will re-raisin themselves when they cool.

Bake until the oats have dried out and mixture is no longer moist when you stir. Enjoy on its own as a snack, or with milk or yogurt!

my finished granola with pecans and raisins

my husband's recipe included oats, sliced almonds, chopped walnuts,
sunflower seeds, brown sugar

from the beginning...mix and match whichever flavors you like best

I used about 1/3 of 1/3 of a cup of Lyle's Syrup

wet ingredients mixed together

spread onto my sheet pan, ready to bake

add the raisins for the final 10 minutes of baking

baked, cooled, and ready for snacking

also delicious with milk!


Bye for now...

Friday, February 3, 2012

Avid Baker's Challenge: Glazed Cinnamon Rolls

This month's Avid Baker's Challenge club are the delicious Glazed Cinnamon Rolls on page 334 of The Weekend Baker by Abby Dodge.
Last May, the ABCers made Overnight Cinnamon Buns and I was curious to see how these compared to those wonderfully light and tasty buns.

Overall, each recipe had pros and cons so if I make cinnamon buns again I will try to do a combination of the two and (hopefully!) wind up with THE perfect cinnamon bun.

So, what did I like about these Glazed Cinnamon Rolls? The pros for me were: they were quick and easy to make and the finished dough was so well behaved and easy to roll out. It was soft and manageable and rolled out without even needing any extra flour. I rolled it out between pieces of wax paper, but I don't think I even needed to do that. [My biggest con for the Overnight Cinnamon Buns is that the dough was very sticky and hard to roll out (although I made them in May vs January so the weather may have played a big part there).] The flavor of the cinnamon filling was also quite nice and didn't get absorbed into the dough, which I like.

The cons were that I thought the dough itself was a little bland vs the other cinnamon rolls, which contained orange zest. I did add some nuts to try to create a sort of a nutty-caramelized topping (in the bottom of the pan) and had mixed results with that...disappointing. I was going for something similar to Baking with Julia's Pecan Sticky Buns, but most of my cookbooks are in storage so I just guessed at the ingredients for that and was so way off in terms of how much butter to put in the pan that it's not surprising mine didn't caramelize. Julia's recipe calls for 1 STICK of butter (O.M.G.) to be spread into a 9" pan...I only used about one tablespoon in a 6" pan. So, obviously, mine did not caramelize like the dreamy pictures in Baking with Julia. As much as I love butter, that is a lot of butter! Although...in the big picture, I guess it's only about 1 T per serving so maybe I can convince myself to go through with Julia's method someday!

Anyway, back to these Glazed Cinnamon Rolls. Next time I will add some lemon or orange zest to the dough to jazz it up a bit and also add some nuts to the filling. Here are my pictures.

mise en place for the dough

my well-behaved dough is set aside to rise

ready!

mise en place for the filling

I added some nutmeg as well as cinnamon

I like to mix the butter to the filling because it makes the mixture easier to spread and
it sticks to the dough better than a granulated topping when you start rolling

this dough was a breeze to roll out

my butter-sugar mixture is added

and spread over the dough

and then we roll...

almost there!

I like to use plain dental floss to slice my buns. It slices perfectly
without putting pressure on - and distorting - the dough

look how beautifully this dough slices!

I baked some in a plan dish, as the recipe instructed

and some with sugar, cinnamon and nuts in the bottom of the pan

after the second rise they are ready for the oven now

these were a bit over-done

smells delicious

my non-caramelized topping

they were best right out of the over while still warm


Bye for now...