Showing posts with label apples. Show all posts

Thursday, December 11, 2014

Rose's Alpha Bakers: English Dried Fruit Cake

Another week of baking with my Rose's Alpha Bakers friends. Up this week: English Dried Fruit Cake. I'm a little late in getting my cake posted, but have been juggling the end of the semester and writing two papers...not to mention working full-time!

I actually made the cake last week and brought it to my office holiday party - it was a big hit (although, I made sure not to label it "fruit cake" so as not to scare anyone off!) so I had the cake and the photos done last week...I just didn't have time to write up my post.

a lovely spice cake with apples, raisins, and pecans
I am not a fan of English fruit cakes, so there was no way I was going to add any glacéed fruit. But, luckily this recipe didn't call for any! The recipe called for any mix of dried fruit that you'd like, in addition to fresh apples, so I kept it simple and just added raisins. So, in reality, my iteration of Rose's English Dried Fruit Cake was more of a spice cake with apples, raisins, and pecans (and rum).

The cake itself was very moist, even 3 days later, so I would recommend this cake if you need to bake something in advance. I added the optional rum into the batter itself so it had a nice, little rum background flavor - it was very nice. The cake also make a lot of pieces, so a good cake for a party or a crowd. Next time I would add more spices - definitely nutmeg and probably some ginger as well.

Enjoy!

mise en place - a pretty easy cake to make!

butter and sugar get melted down together...

... and then cooked for a few minutes

while the raisins are being "plumped" up in boiling water

the apples and zest are added to the sugar-butter mixture
...I had to try a bite of this, just to be sure...(delicious!)

then the eggs are added one-by-one

the nuts and raisins are tossed in the flour
(next time I would add the raisins directly to the wet mixture because
a lot of flour stuck to the wet raisins even after baking and didn't look good)

not very appetizing-looking batter...

but, ahhh, the finished cakes were much nicer!

delicious!

...I'd better just try a bite before the party. Yum!


Bye for now...

Friday, August 22, 2014

Apropos of Nothing: A Hearty Winter Breakfast

As the title says...this is apropos of nothing. I just thought this hearty breakfast from last winter looked so delicious that I wanted to share. It's a bit "do you want any breakfast with that bacon" but hey...it's bacon!

oh, yum!


Bye for now...
 

Friday, January 3, 2014

Homemade puff pastry becomes...an apple tart

A beautiful, simple, and very easy apple tart. This is one of my all-time favorite desserts - especially for a family dinner, holiday, or dinner party - because it is so easy, but looks so fancy and beautiful! This time, I made my own homemade puff pastry, but you can also use store-bought (I think the Dufour brand is best).

gorgeous and delicious

look at those layers...beautiful!

The recipe is adapted from Martha Stewart's and you can use store-bought puff pastry or homemade. I've made homemade puff pastry a few times recently, once for Thanksgiving and once to make pithiviers. You can see the step-by-step directions for my puff pastry dough here if you want to make your own...try it, it's fun!

Ingredients

1 sheet homemade puff pastry (approx. 1 pound), or use frozen store-bought, thawed
all-purpose flour, for rolling out the dough
1 egg, lightly beaten, for egg wash
1/2 c. homemade or good-quality, unsweetened, applesauce
2-3 apples, peeled and cut into thin slices (use Granny Smith or other firm, tart apples)
juice from 1/2 lemon (or as much is needed to prevent the apples from browning
2 t. unsalted butter, melted
2 t. sanding or turbinado sugar
2 t. apricot preserves
1 tablespoon water

Method
Roll out your puff pastry sheet to approximately 14x16 inches. Trim 1 inch off from each side and carefully set aside. Put the large sheet of puff pastry on a parchment paper lined sheet pan.

Using the egg wash, carefully brush the outer 1" edge of the large pastry and place the 1 inch strips on the edge. Press gently with your fingers to seal and create an outer crust. You'll need to trim the strip you cut from the short ends so it fits back onto the larger piece of dough. Be careful with the egg wash so you don't let any drip over the cut edge of the dough. If the egg drips over the side, it will seal together all of your lovely puff pastry layers when you bake the tart.

Using the tines of a fork, prick the middle part of the pastry all over so it won't rise during baking. Put the puff pastry into the fridge to chill while you prepare the apples.

my lovely sheet of homemade puff pastry

The ingredients for the apple filling...so simple!

mise en place for the filling

Preheat the oven to 400 degrees while you prepare the apples.

Peel and core your apples. Cut the apples into thin slices and toss with a bit of lemon juice to they do not discolor.

slice, toss with lemon juice...and done!

Remove your puff pastry from the refrigerator and spread the applesauce over the inner (pricked) area. It should be chilled and very firm at this point, so you can do this quickly and not worry about being super gentle.

spreading the applesauce over the chilled dough

Layer the apple slices over the applesauce in whatever pattern you like. For expediency's sake, I just layer them like this, slightly overlapping.

Brush the apples in the middle with the melted butter.

Brush the outer 1" crust strip with the egg wash. Again, be careful not to let the egg wash drip over the side edges or it won't puff properly.

Sprinkle the sanding sugar over the entire tart - the apples and the crust.

brushing the apples with melted butter

brush the outer crust with the egg wash,
then sprinkle the sanding sugar over the entire tart

Bake the tart at 400 degrees for 20 minutes, until the edge crust starts to puff up. Reduce the temperature to 375, rotate the pan from front to back, and bake for an additional 25 or so minutes until the crust is golden brown.

During the last 10 minutes of baking, prepare the apricot glaze. Heat the apricot preserves and tablespoon of water in a small saucepan over low heat, stirring with a spoon or heat-proof spatula until they are completely combined and the mixture is hot. Remove from heat and set aside until the tart is done.

the baked tart

When the tart is done, gently remove to a cooling rack. You should be able to use the parchment paper to (gently!) lift the tart out of the sheet pan and onto the rack and then slide the parchment paper out from under.

Generously brush the apples with the apricot mixture.

Serve at room temperature with a small scoop of vanilla ice cream, whipped cream, or just enjoy plain.

so elegant...perfect for a party!


Bye for now...

Homemade puff pastry becomes...apple turnovers

I used half of my homemade puff pastry recipe to make these flaky, delicious apple turnovers. They were so pretty and professional-looking...but very easy. I definitely recommend trying these! You could also add raisins, nuts or use other fruit. The baked turnovers lasted about 3 days; next time I make them I'll freeze them when assembled (but unbaked) and then baked as needed, so we can enjoy them fresh out of the oven. They would be amazing with a small scoop of vanilla ice cream!

I used this bon appétit recipe (my slight adaptations are below) for Chaussons aux Pommes (French apple turnovers). Delicious!

so beautiful!
Ingredients
2 Granny Smith apples
2 other tart, firm apples, such as pink lady (or just use 4 Granny Smith apples)
1/4 c. water
3 t. sugar
3/4 t. fresh lemon juice
zest from one small lemon
1/8 t. freshly grated nutmeg
1/4 t. cinnamon
pinch of salt

1/2 recipe homemade puff pastry, approx. 15 ounces (or, use store-bought frozen puff pastry, thawed)
1 egg, lightly beaten
a few teaspoons of granulated sugar

the filling is so simple - apples, a bit of water, lemon, zest, sugar, salt, and spices

can I peel the apple in one go?

Method
Peel the apples and cut into small, uniformly-size pieces.

Add the apple pieces, water, sugar, lemon juice, lemon zest, salt, and spices to a medium saucepan. Stir to coat the apples. Bring the water to a boil and then lower the heat to medium-low, cover, and simmer for about 8-9 minutes. Give the apples a periodic stir so they cook evenly. You want the apple filling mixture to soften, but still have chunks of apples...we're not making applesauce!

Let the apple mixture cool completely (or it will melt the butter in your puff pastry and ruin the layers before you bake).

cooking down the apples

the finished apple filling
Here is my full recipe of homemade puff pastry; I used half for the apple turnovers and the other half for my Thanksgiving apple tart.

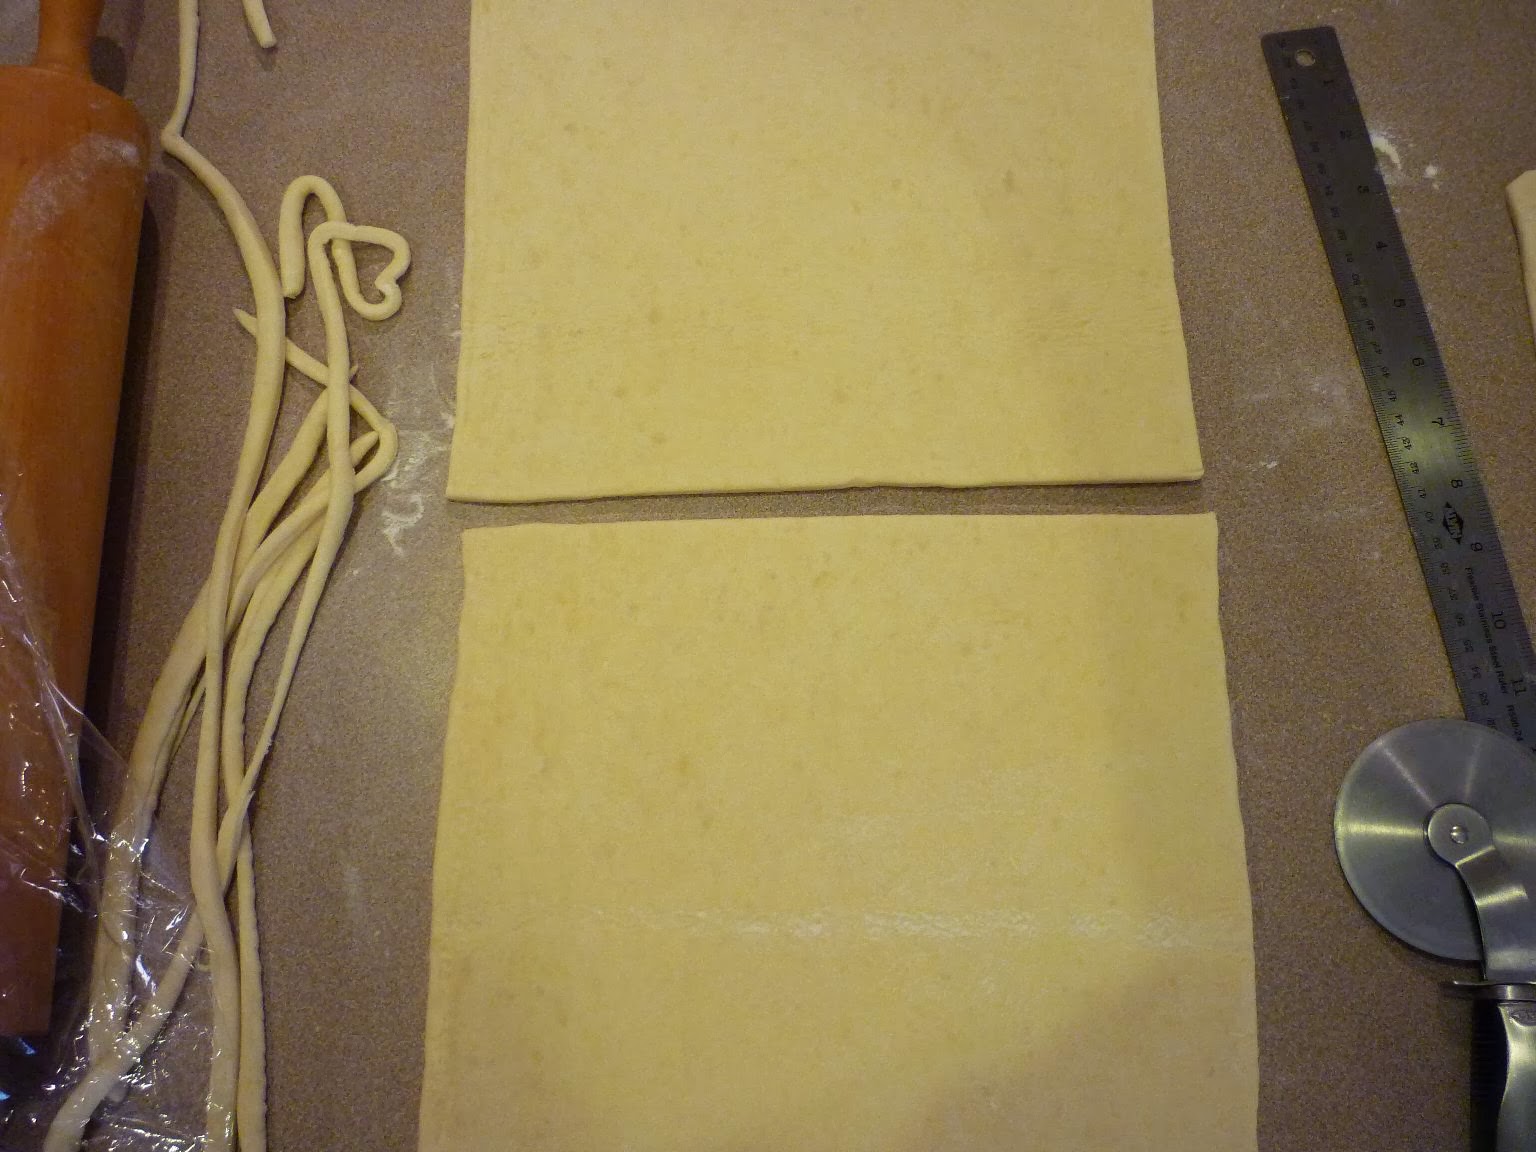
my full recipe of puff pastry; half is needed for this recipe

To make the tarts, roll out your puff pastry to a just larger than 15" square (you shouldn't need much, if any, flour when rolling). You want it slightly larger so you can trim off the edges and have a nice, sharp edge, which will allow the pastry layers to "puff" when it bakes. You can see how much I trimmed off in the above picture.

Using a ruler and sharp knife or pizza/pastry cutter, cut your 15" square into nine 5" squares; see below picture.

my nine 5" squares

Carefully stack the 9 squares between plastic wrap and chill for 30 minutes.

let the dough rest before filling and baking

After the dough has rested, you're ready to fill.

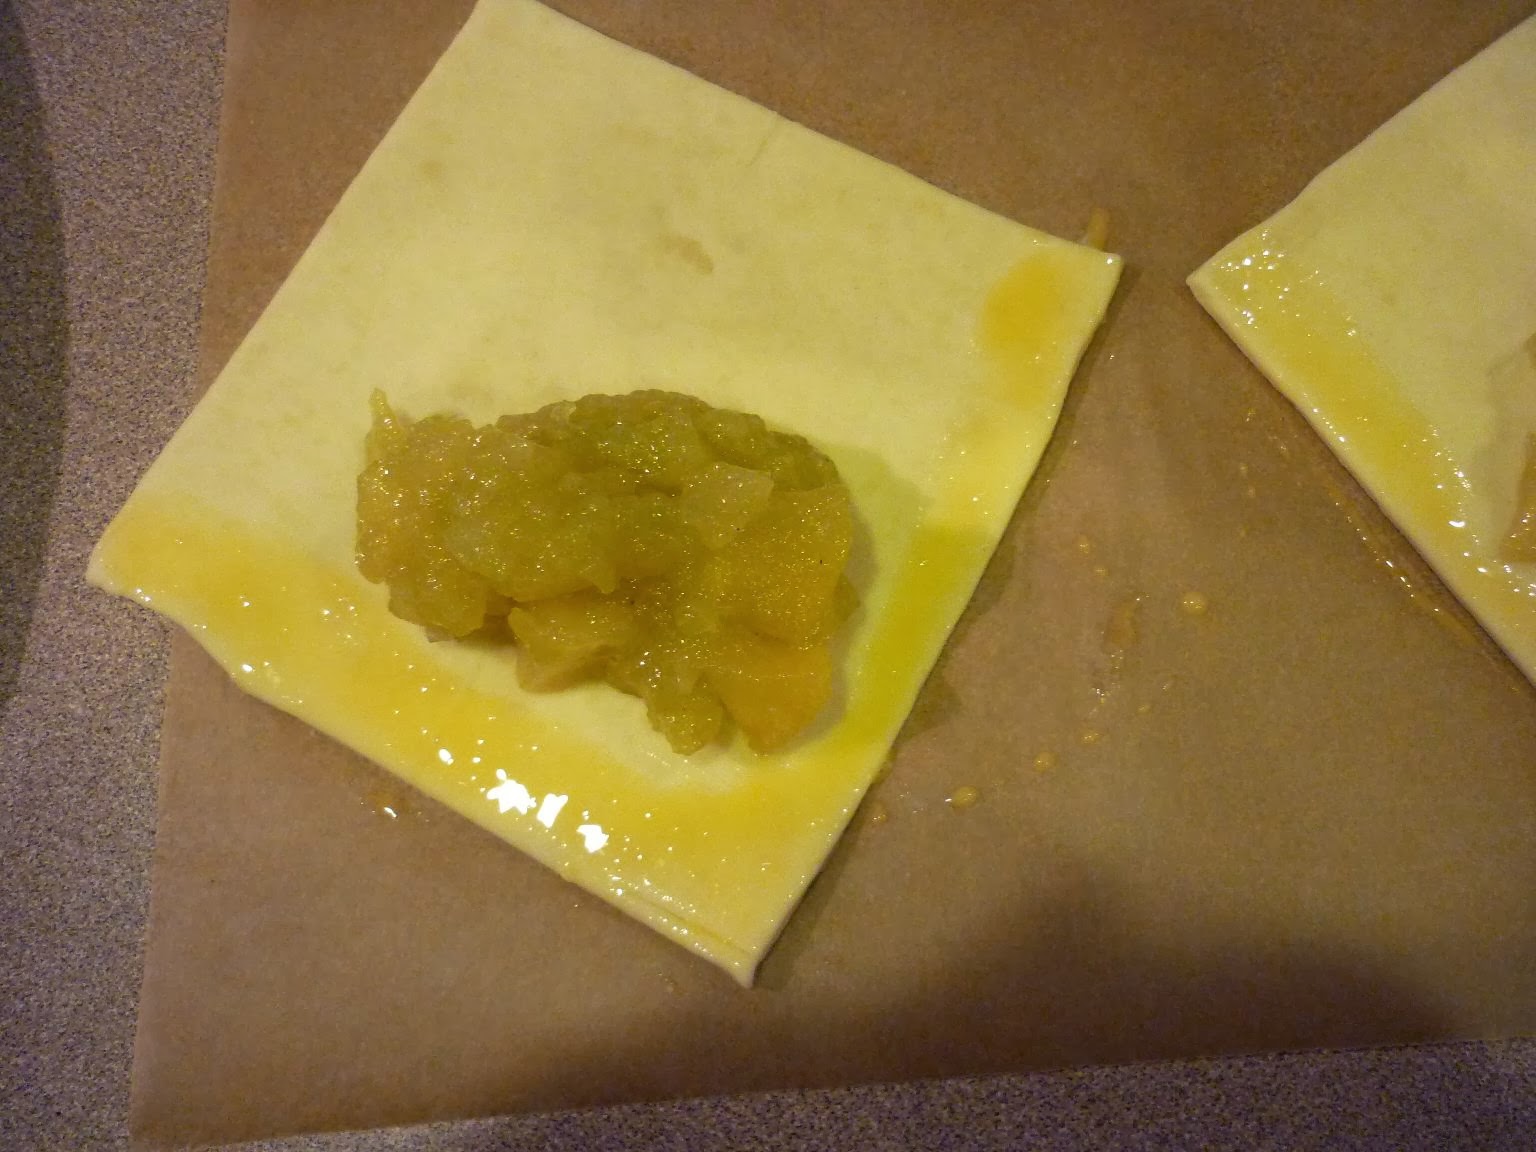
Lightly beat the egg with a fork and set aside. Put a heaping tablespoon of filling in the bottom center of the dough then brush the edge of the bottom half with your egg wash and gently fold the top half over. Using your fingers, gently press the two edges of the dough together. Don't press too hard or you will force the egg out and over the cut edge. You want to avoid getting egg on the cut edges of the dough or it will seal together all of your beautiful layers when you bake the turnovers.

At this point, the turnovers could be frozen - this is what I will do next time so they can be baked individually for breakfast or a snack.

adding the filling and sealing it inside

After all of the turnovers are filled, give each of them an egg wash and sprinkle with sugar. I used regular granulated sugar, but you could also use sanding sugar or turbinado sugar.

a quick brush of egg and sprinkle of sugar


Pop the filled, egg-washed turnovers into the fridge for another 20 minutes or so until they firm up a bit. This will chill the butter in the puff pastry and will help create better layers when you bake.

During this final chill, preheat the oven to 400 degrees.

The final step before baking is to cut some slits so the steam can escape during baking (otherwise they might pop open during baking).

ready to bake!

Bake on two parchment paper lined sheet pans at 400 degrees for 15 minutes. Lower the temperature to 350 degrees and bake for an additional 10 minutes or so, until golden brown. When you lower the temperature, also rotate the pans from front-to-back (if using two oven racks, also swap the pans from top to bottom).

gorgeous!

so pretty...and look at those puff pastry layers

Remove from the oven and, using a spatula, gently move to a cooling rack. Let cool for about 15 minutes; serve warm. They would be delicious with vanilla ice cream!

smells so good!

can't wait to dig in

flaky and delicious!

so good...I'll have to make these again soon...


Bye for now...

Friday, April 6, 2012

Fresh juice! Carrot, apple & ginger

My friend and I decided to do a juice cleanse to celebrate spring so, first things first, it was time to buy a new kitchen gadget. We both bought the Breville BJE200XL 700-Watt Compact Juice Fountain. The motor sounds as powerful as a mini jet engine (but luckily not as loud) and it only took seconds to grind up the veggies and fruit. My friend's first juice was a cucumber-apple-ginger, mine was a carrot-apple-ginger juice. Both were delicious! I wasn't quite sure I could jump right into some of the green veggie juices (kale in a juice?! I'll get there soon) so I started with something a little newbie-friendly.

I took a handful of baby carrots, one Rainier apple and about 1/2 inch of fresh ginger. They all went into the juicer and delicious carrot-apple-ginger juice came out. It was so fresh tasting and chock full of vitamins! Both the carrot and apple taste came through and the ginger added a spicy kick.

It was really fun. I can't wait to try some more adventurous recipes.

my new juicer...exciting!

fresh carrots, an apple and a bit of ginger go in...

and voila, juice!

it was so fresh and tasty

I'll have to figure out different ways to use the pulp - so much healthy fiber!


Bye for now...

Sunday, January 30, 2011

Christmas eve & Christmas 2010

A few pictures from Christmastime, 2010. We had the family over for dinner on Christmas eve and then went to my brother and sister-in-law's for Christmas morning. My 4 year-old niece was so good and waited for all of us to get there at 10:00 before tearing into any presents. We were impressed!

My mom wanted an apple pie for Christmas, I was happy to oblige!

dotted with butter and ready for the top crust

before it goes into the oven, it's brushed with heavy cream (for browning) and sprinkled with
sanding sugar (to make it shimmer)

fresh out of the oven...yum!

also made twin apple tarts for dessert

Yippee, Christmas morning! Can't wait to dig into this amazing spread made by my sister-in-law!

delicious!

Merry Christmas

Bye for now...